
How to Merge, Trim, and Cut Clips Using CapCut Desktop Video Editor

In today’s fast-paced digital world, video content is one of the most powerful ways to connect, inform, and entertain. Whether you’re putting together a YouTube vlog, a business promo, or a TikTok montage, the core of any great video lies in solid editing. That means learning how to merge, trim, and cut clips — three essential editing tasks every video creator should master. If your content involves narration, CapCut even supports tools like text to speech to help you convert written scripts into natural-sounding voice-overs.
Why Learn Basic Edits?
Before we dive into the how-to, let’s quickly explore why merging, trimming, and cutting are so valuable for everyday editing:
- Merging allows you to splice together various video clips into one cohesive narrative.
- Trimming allows you to eliminate awkward pauses, errors, or unnecessary footage at the beginning or end of a clip.
- Cutting provides you with the ability to divide clips, reorder content, or remove certain moments from the middle.
All three tools work together to tidy up your video timeline and keep your content concise and engaging. Let’s begin.
You can also enhance productivity by integrating an AI video generator into your workflow when creating bulk content from templates or repurposing footage.
Step 1: Create a New Project and Import Clips
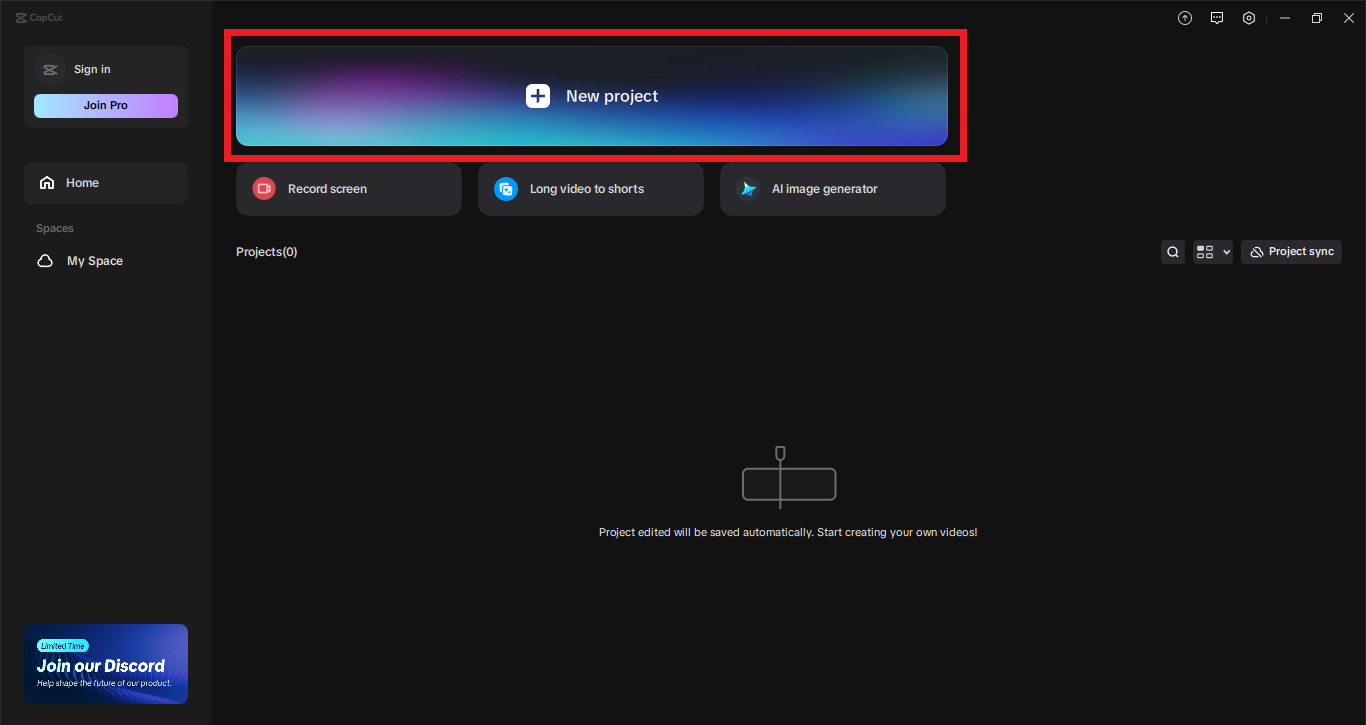
It all begins with preparing your workspace in CapCut. Here’s how you begin: Open the CapCut Desktop Video Editor and press the “New Project” button. This initializes a clear timeline where you will perform all your editing. To add your media files, press the “Import” button to import the video clips to edit. You can add several files at once — just drag them from your file explorer and drop them here.
Once imported, place your video clips at the bottom of the screen’s timeline. Every clip will be represented by a different block on the timeline, where you can edit each of them or as a whole. Everything being set up now, let’s proceed through the three major steps: cutting, trimming, and joining.
Step 2: Cut Clips Precisely
Cutting is convenient when you need to cut out parts from the middle of a clip or divide it into pieces.
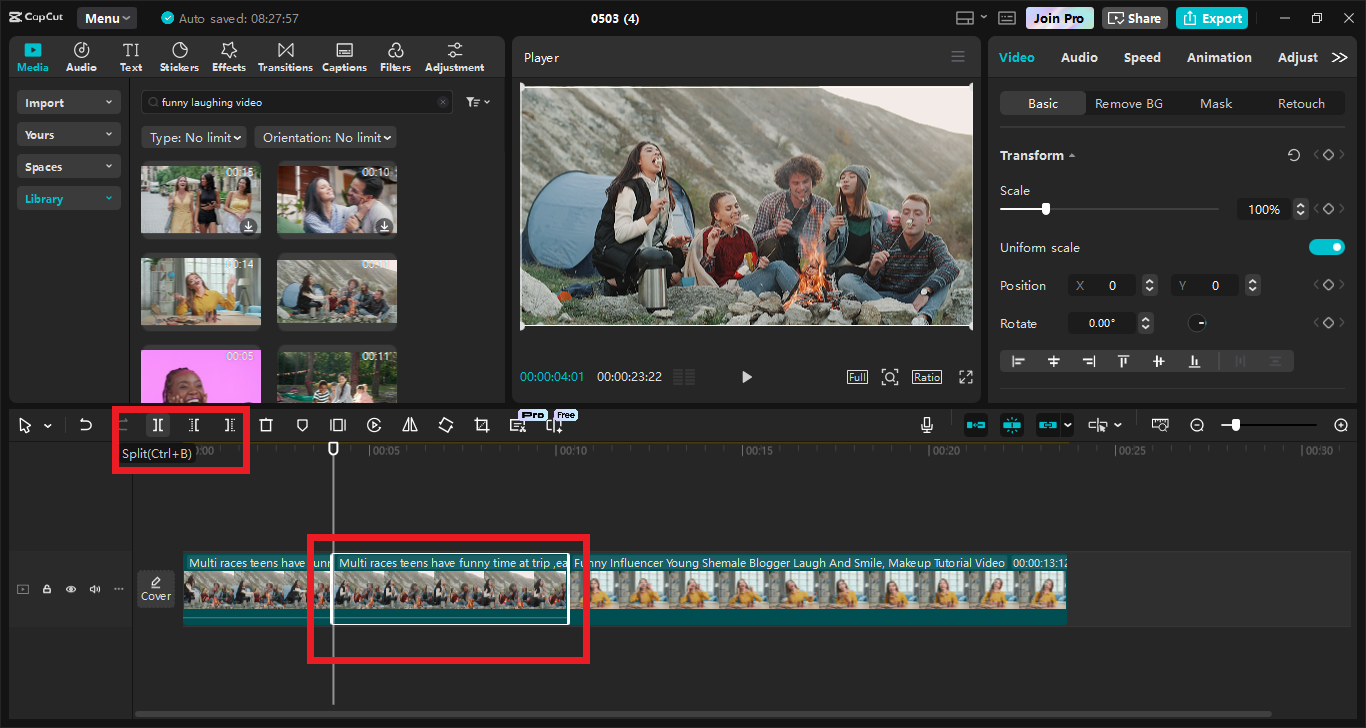
Here’s how you can do it: Place the playhead (the white vertical line) on the very place you want to cut. Choose the clip on the timeline. Click the “Split” button (scissors icon) or press Ctrl + B on your keyboard. This will split your clip into two sections. You can cut as often as you want, and then delete or rearrange parts as you need. For instance, if a person coughs or there is an uncomfortable silence, simply split and delete that part.
Step 3: Trim the Start and End of Clips
Trimming is employed to tidy up the beginning and end of your clips — usually where there’s surplus footage, quiet, or positioning the camera.
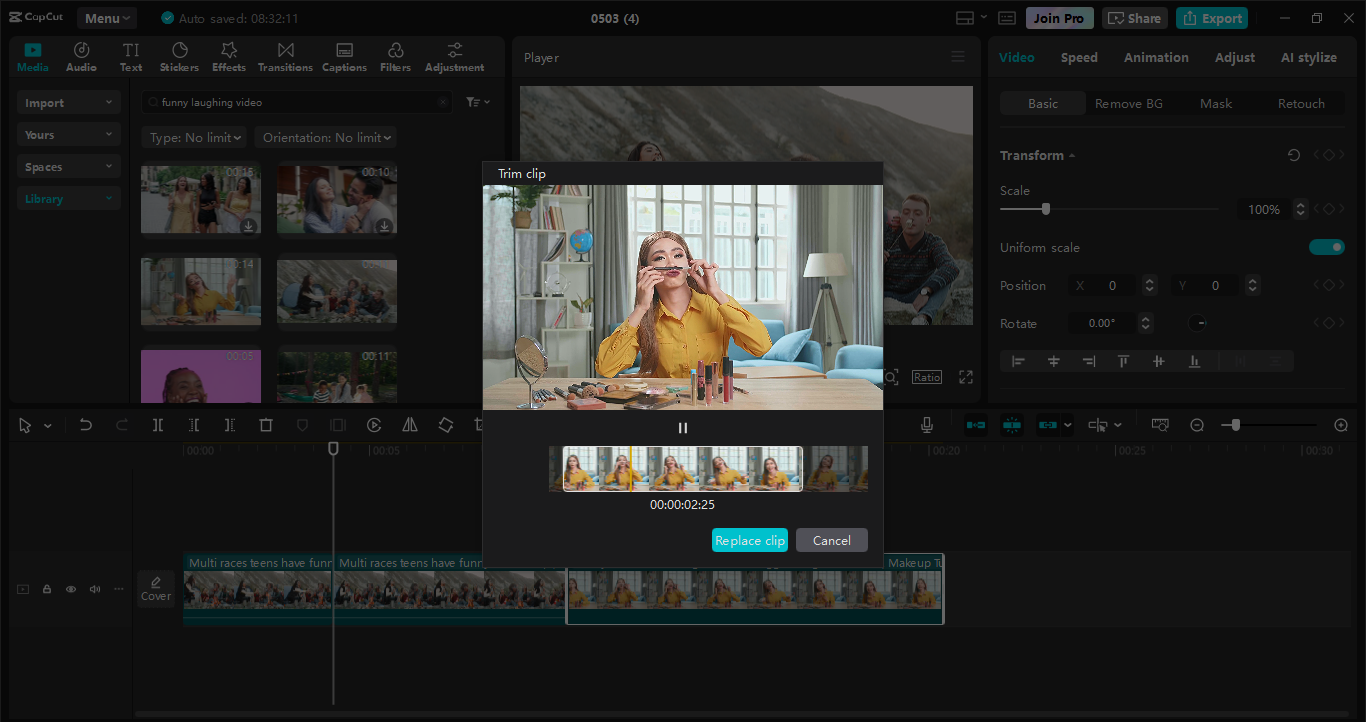
Here’s how to trim: Place your mouse over the edge of a clip on the timeline. Your cursor will become a trim tool (a double arrow). Click and drag in from either side to make the clip shorter. You’ll notice the clip visually reduced in size as you cut it. This is wonderful for editing content on the fly without having to cut and delete.
Step 4: Merge Multiple Clips
Merging involves placing various clips into a combined sequence — great for combining reactions, interviews, B-roll, or multi-camera footage. To merge clips: Just drop your second clip onto the timeline and put it after the previous one. CapCut will show the clips back-to-back like a single piece of video automatically. You don’t have to get fancy — simply lining up clips on the same track makes them combine in playback and export.
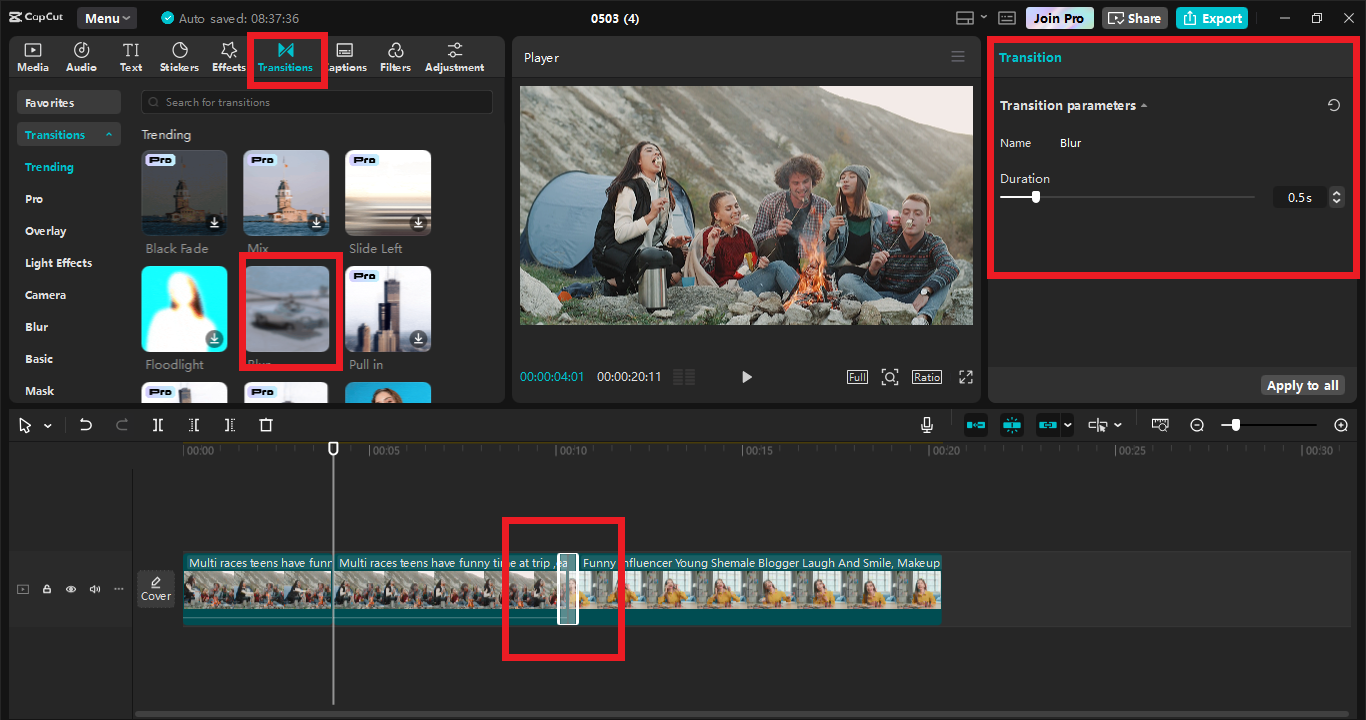
Another option to merge clips is to insert a transition. If you prefer to ease the transition between clips, click the tiny white square where two clips intersect and select a transition effect (such as fade, zoom, or slide). This adds a touch of class to your editing.
Step 5: Refine and Export Your Final Video
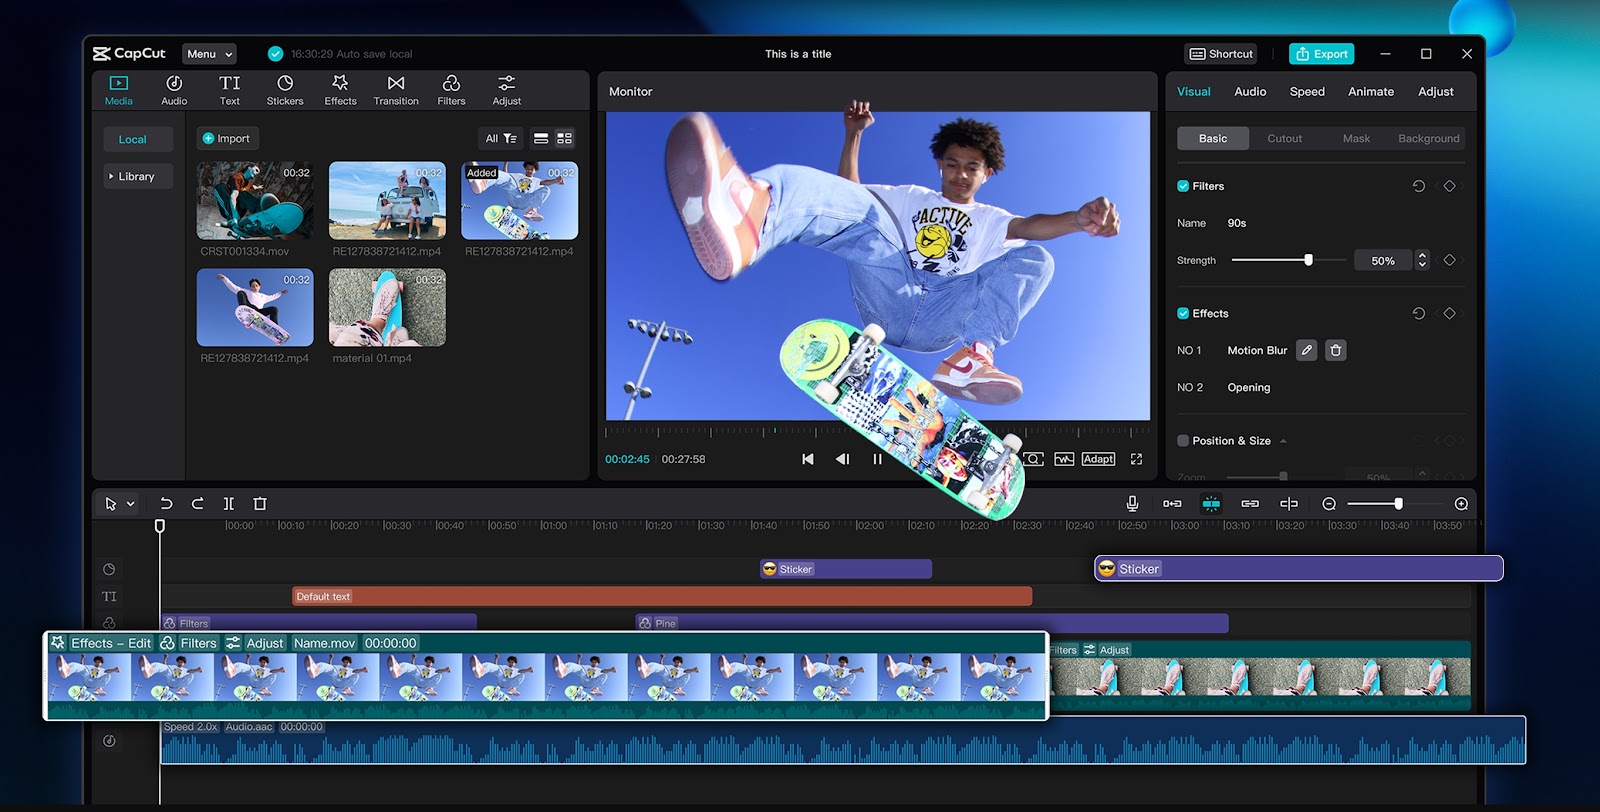
After your clips are merged, trimmed, and cut to your specifications, it’s time for the final touch and export. You can add text overlays, background audio, or subtle filters to your video. CapCut allows you to easily drop these in if you’d like to add a bit of extra flair to your content. Want to spice up your audio? Try CapCut’s voice changer feature to modify your voice for humor, drama, or character effects.
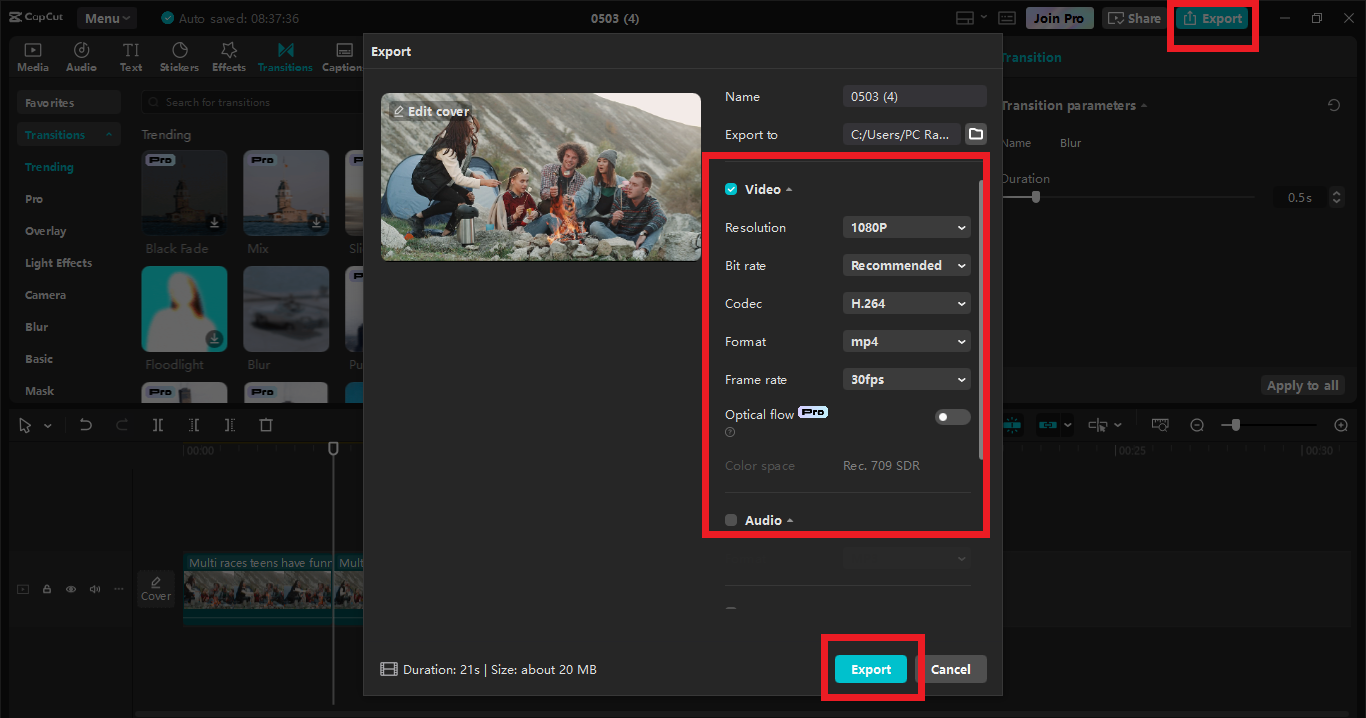
Now export your video. Tap the “Export” button in the top-right corner. Select: 1080p for normal quality in resolution. The format MP4 is widely supported, and a frame rate of 30fps is good enough for most purposes. Name your video file, choose a save location, and click “Export”. CapCut will render your finished product, ready for YouTube, TikTok, Instagram, or wherever you post.
Tips for a Quicker Editing Workflow
To make your edits even quicker each day, give these tips a try:
- Use keyboard shortcuts: Ctrl + B for split, Spacebar to play/pause
- Label your clips in the media bin to keep things organized
- Zoom in on the timeline for more accurate cutting (use the slider at the bottom)
- Mute unused audio clips by right-clicking and choosing “Mute.”
- Keep it simple: You don’t need fancy effects — clean cuts and trims often work best
Final Thoughts
Whether you’re making short-form content, editing family videos, or preparing social media posts for work, learning how to merge, trim, and cut clips is essential. These three foundational skills are the building blocks of good video editing, and with CapCut Desktop Video Editor, they’re more accessible than ever.
Last Updated: May 28, 2025


