
Tearing Down Sapphire’s RX 9070 XT Pulse: Thermals, Fan Response, & Noise


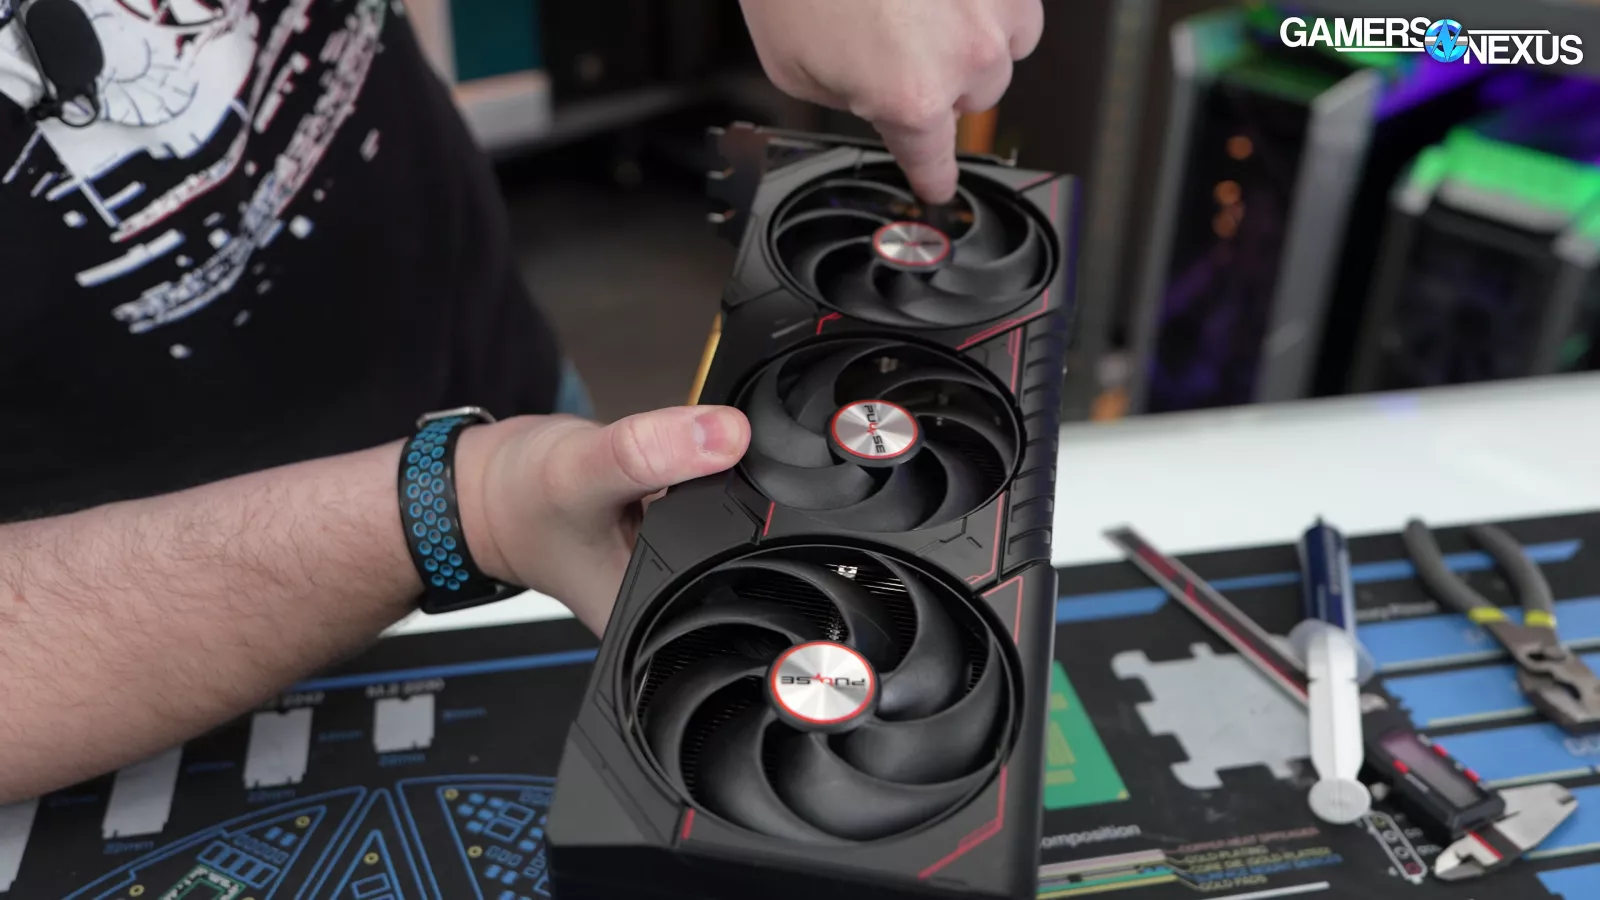
Taking an initial look at the card, we noticed that the fin stack was bent. We’re going to examine to see if it’s properly secured or if there is a manufacturing issue. At first glance, we don’t think it should affect performance too much, but maybe acoustics.
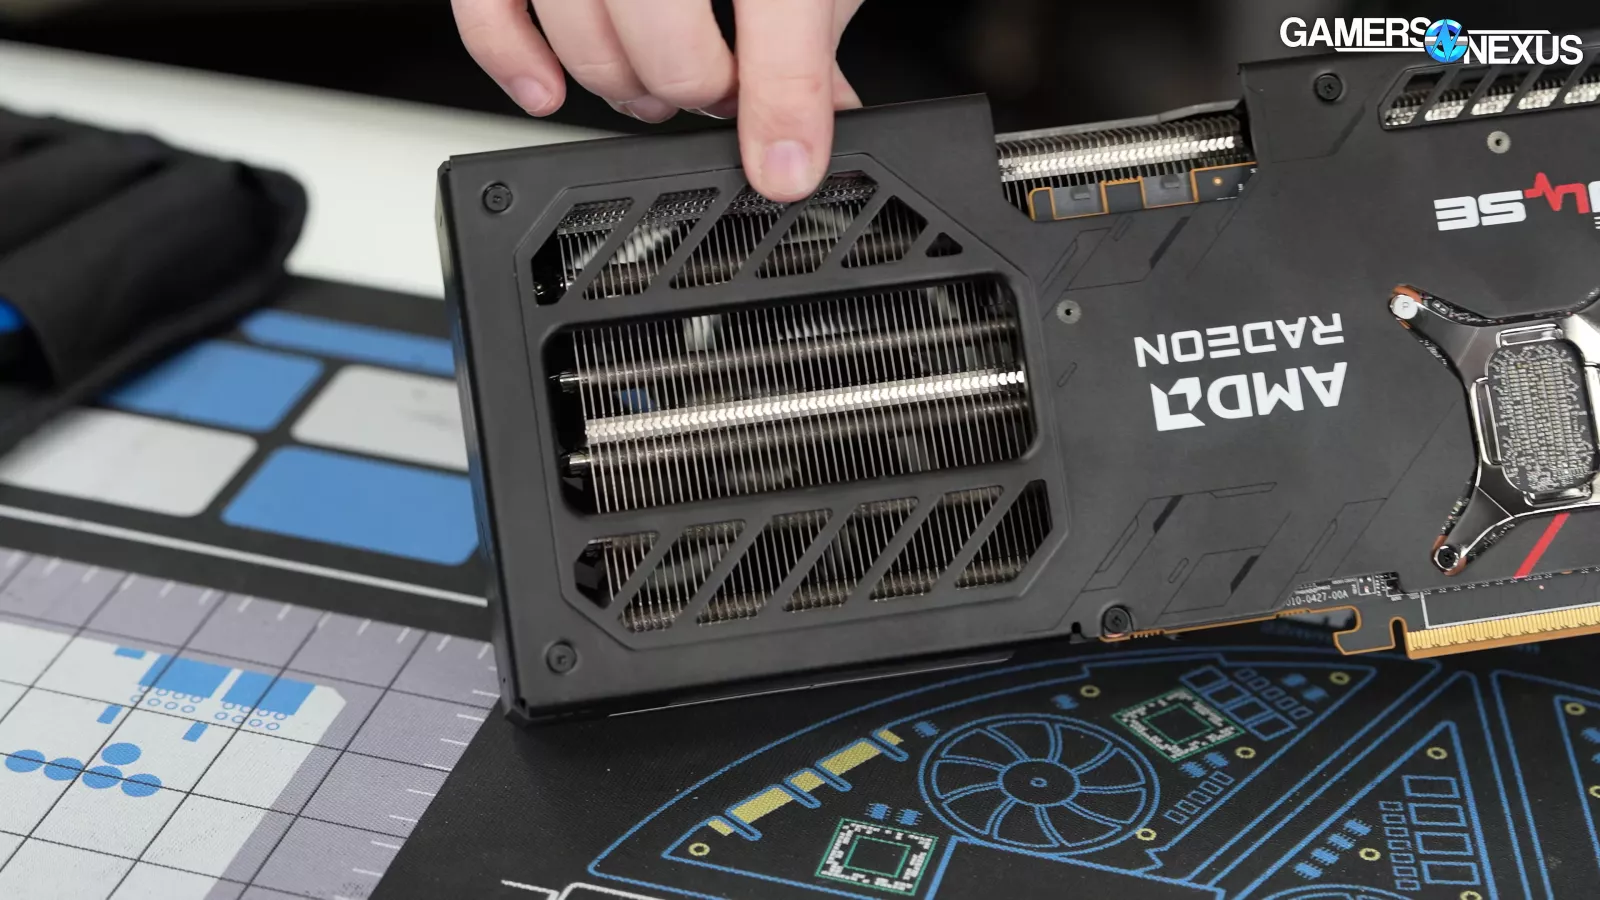
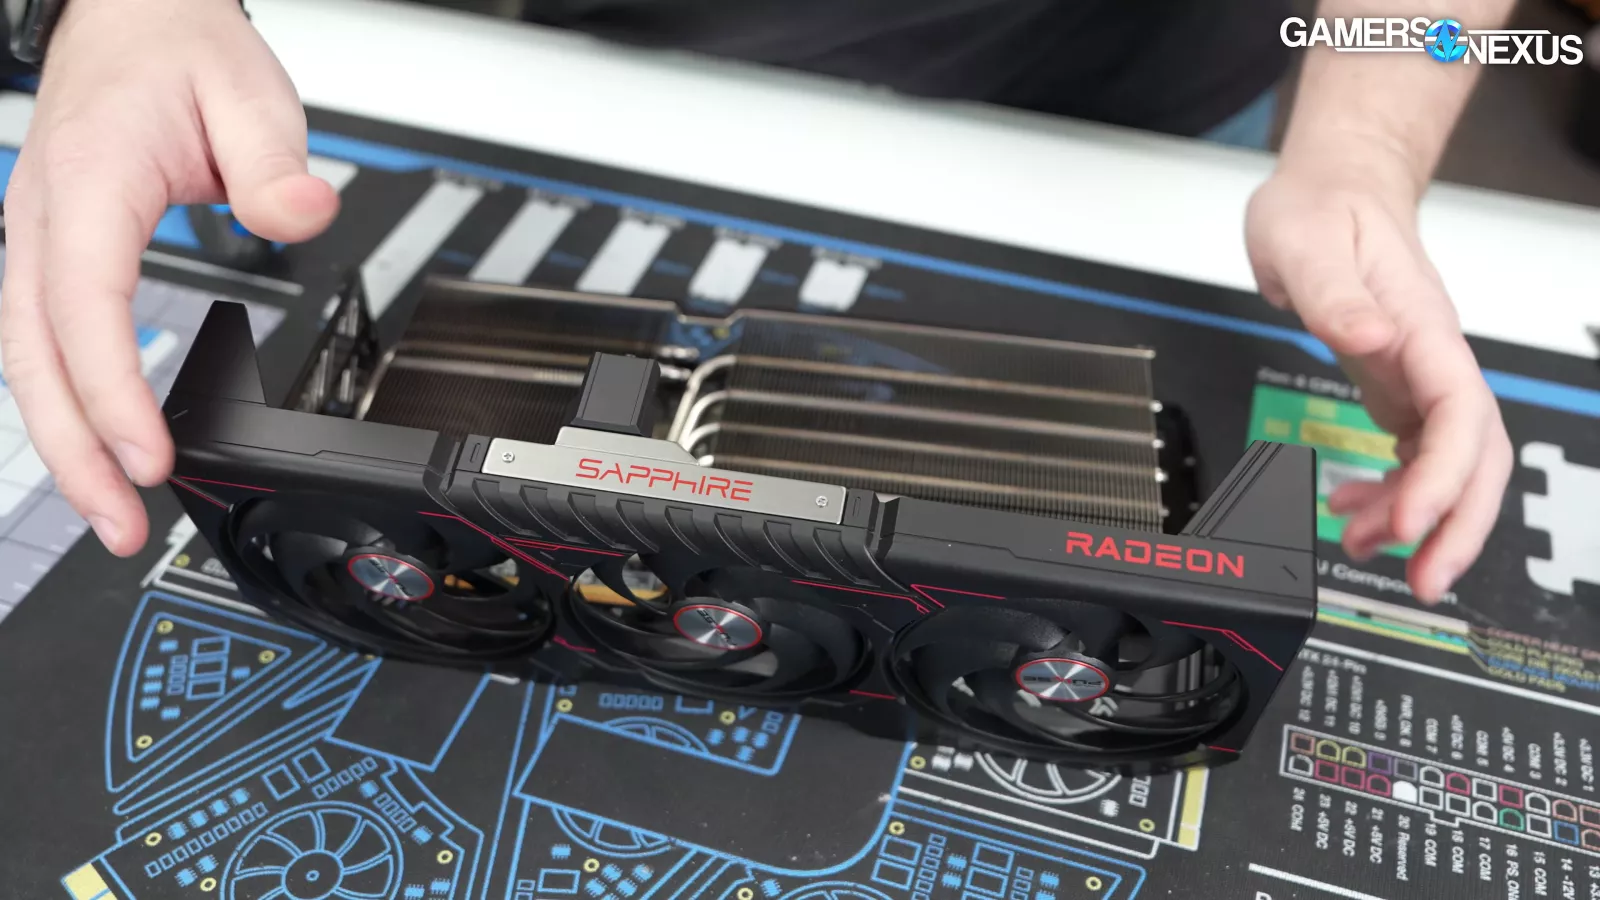
The back of the card has a large flow-through area, which is good, and it’s coupled with a single fan. This is different from NVIDIA’s solution on its FE cards where it puts the PCB in the center of the card and pushes air through the sides.
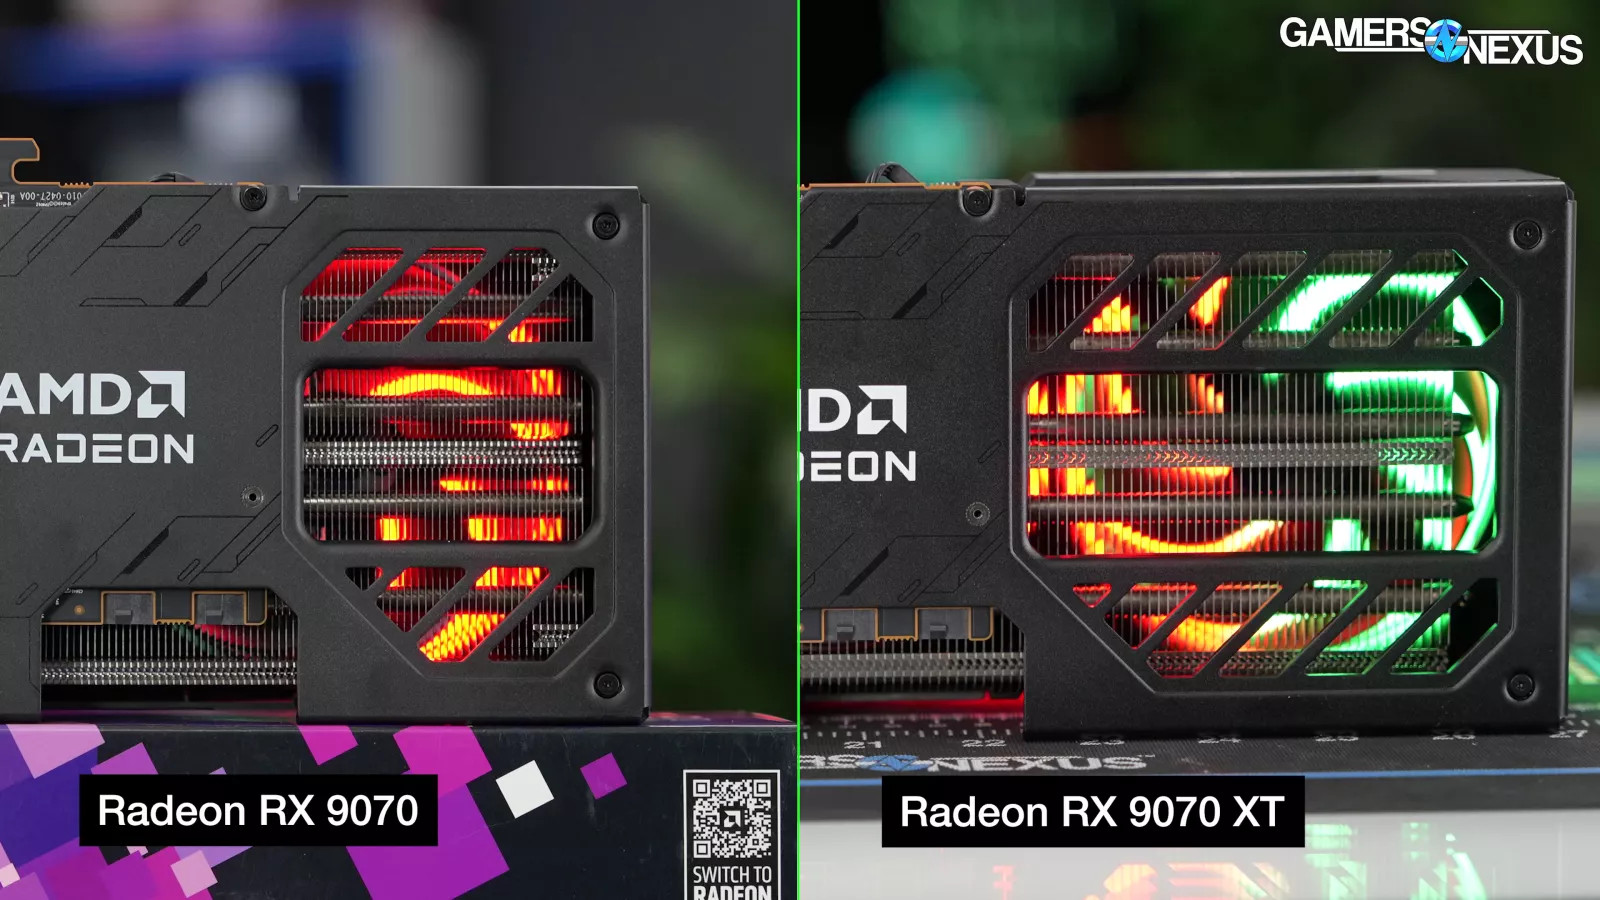
For comparison, the RX 9070 (non-XT) Pulse card has a smaller flow-through area with its shorter card design.
The fans on the 9070 XT Pulse are different sizes and the 2 fans on the outside spin in the opposite direction from the middle one.
The rear side of the card has a perforated PCIe slot that is supposed to let some air escape but if you look closely inside, you’ll notice basically what is a wall for the fin stack and that’s because the fins are oriented vertically. This means the air is mostly going to come out the top of the card and not the bottom.
Some air will also get pulled in through the front of the card and pushed out the back. This is all pretty standard thus far.
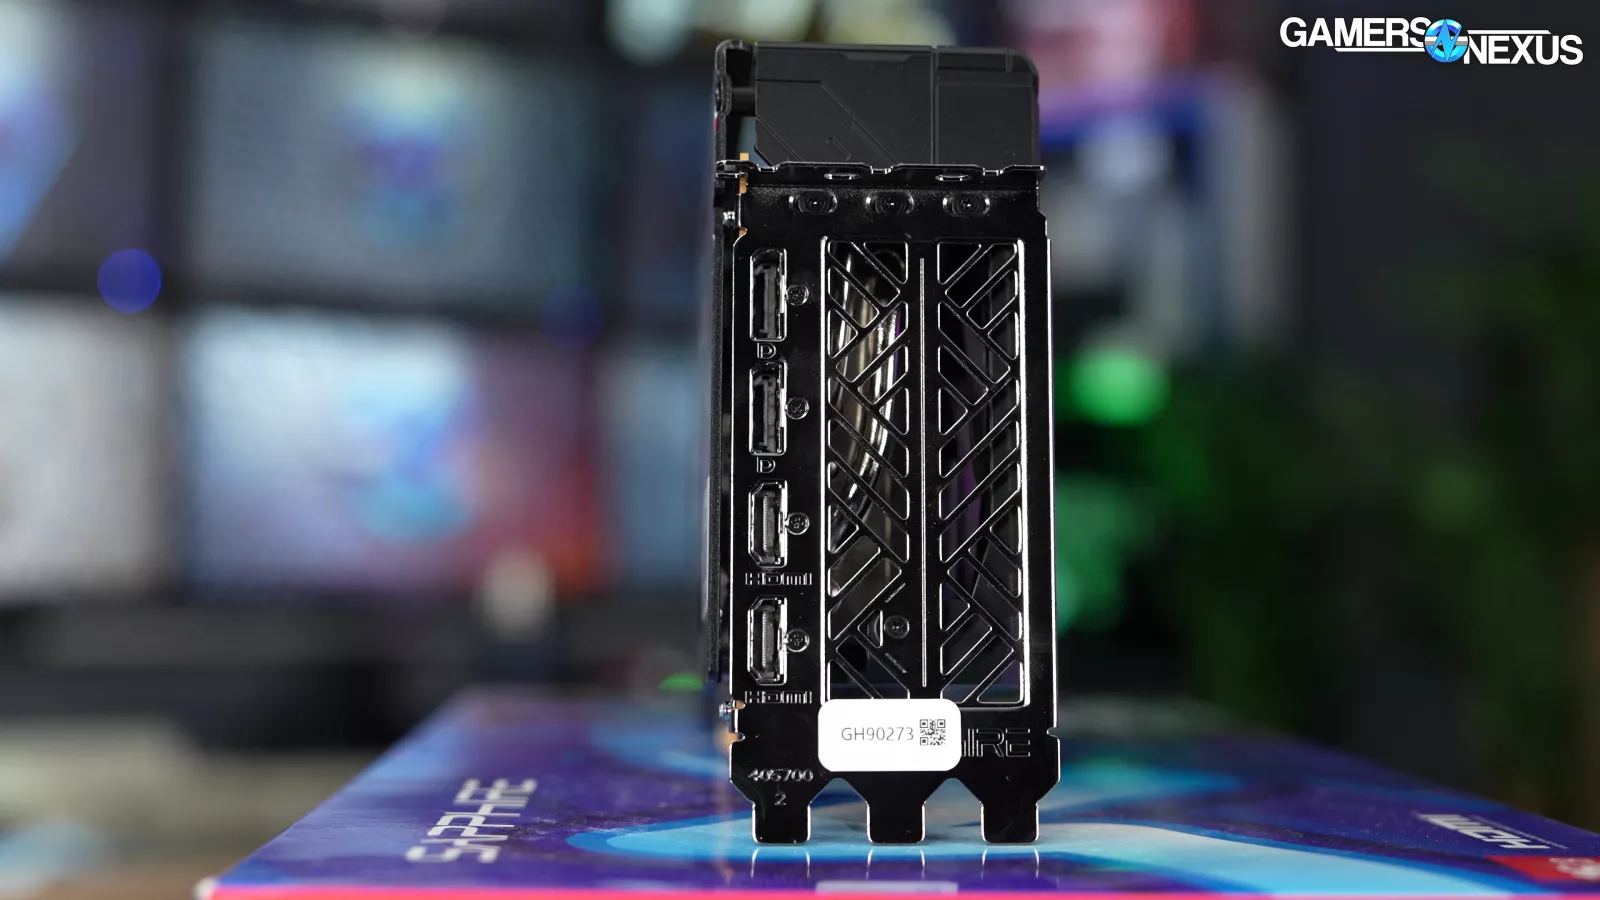
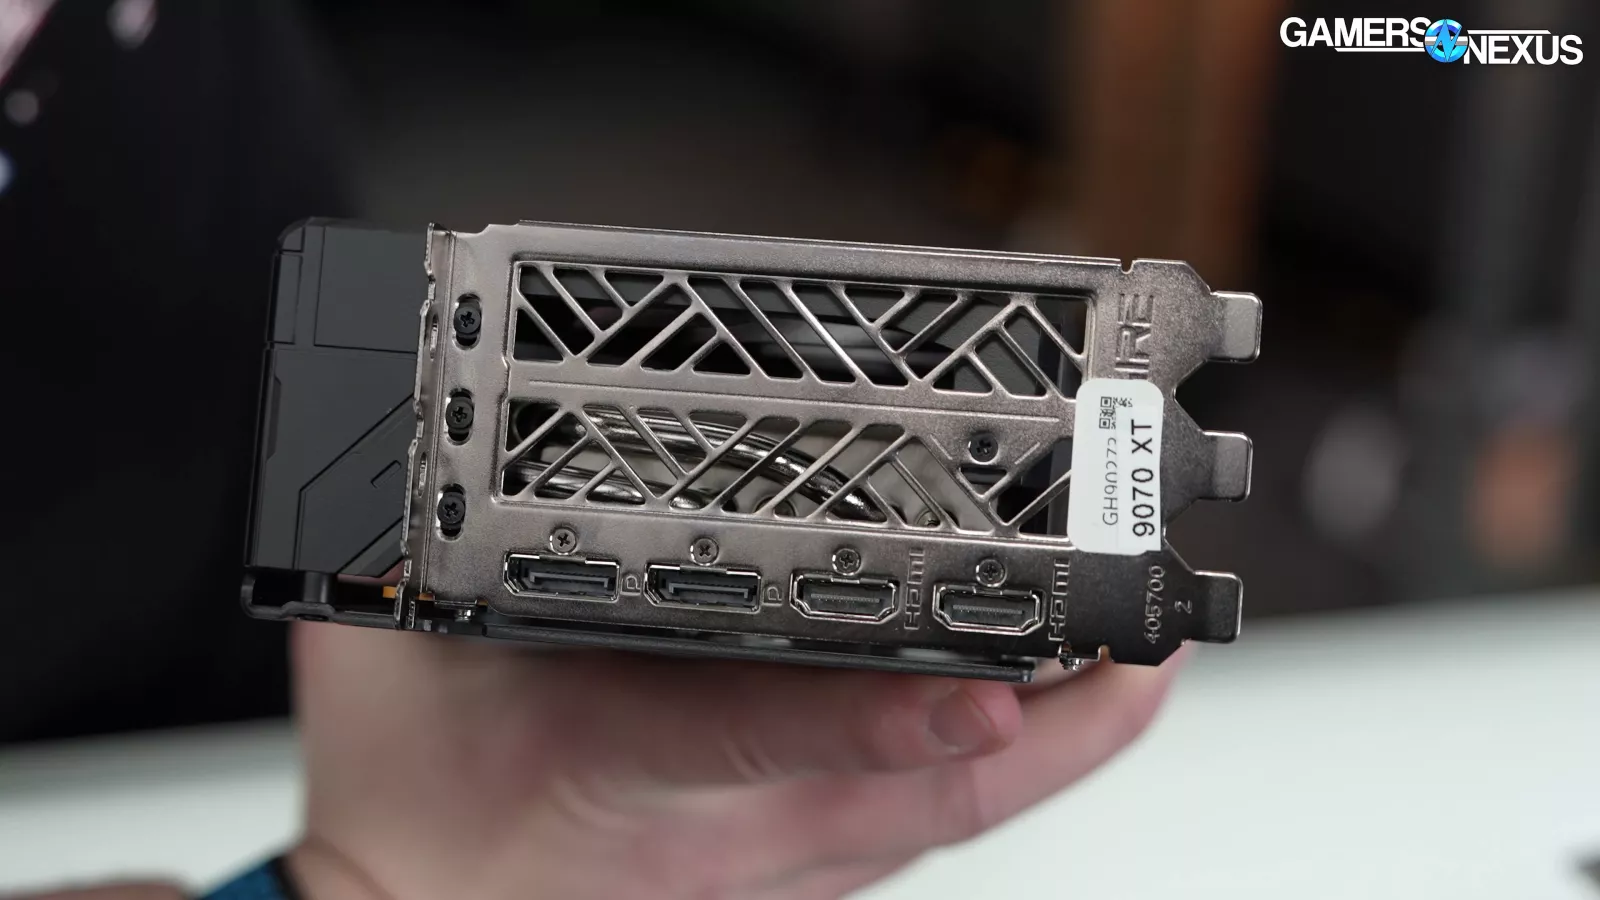
Sapphire’s RX 9070 XT is a 3-slot card with a full 3-slot PCIe bracket. This is great as it allows the card to be a bit more rigid.
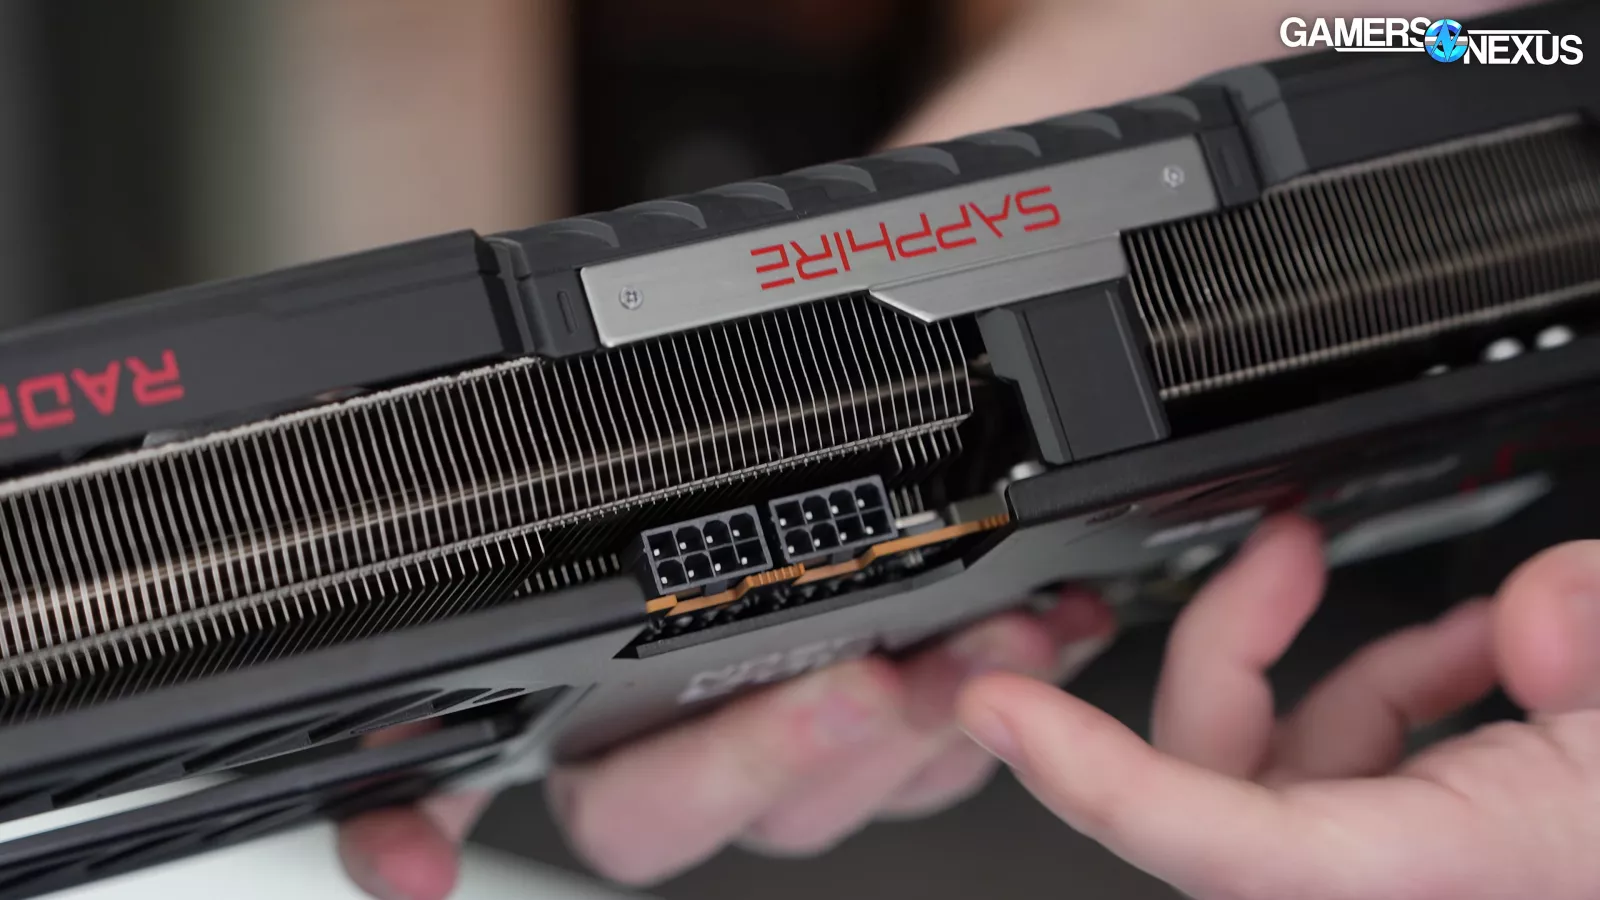
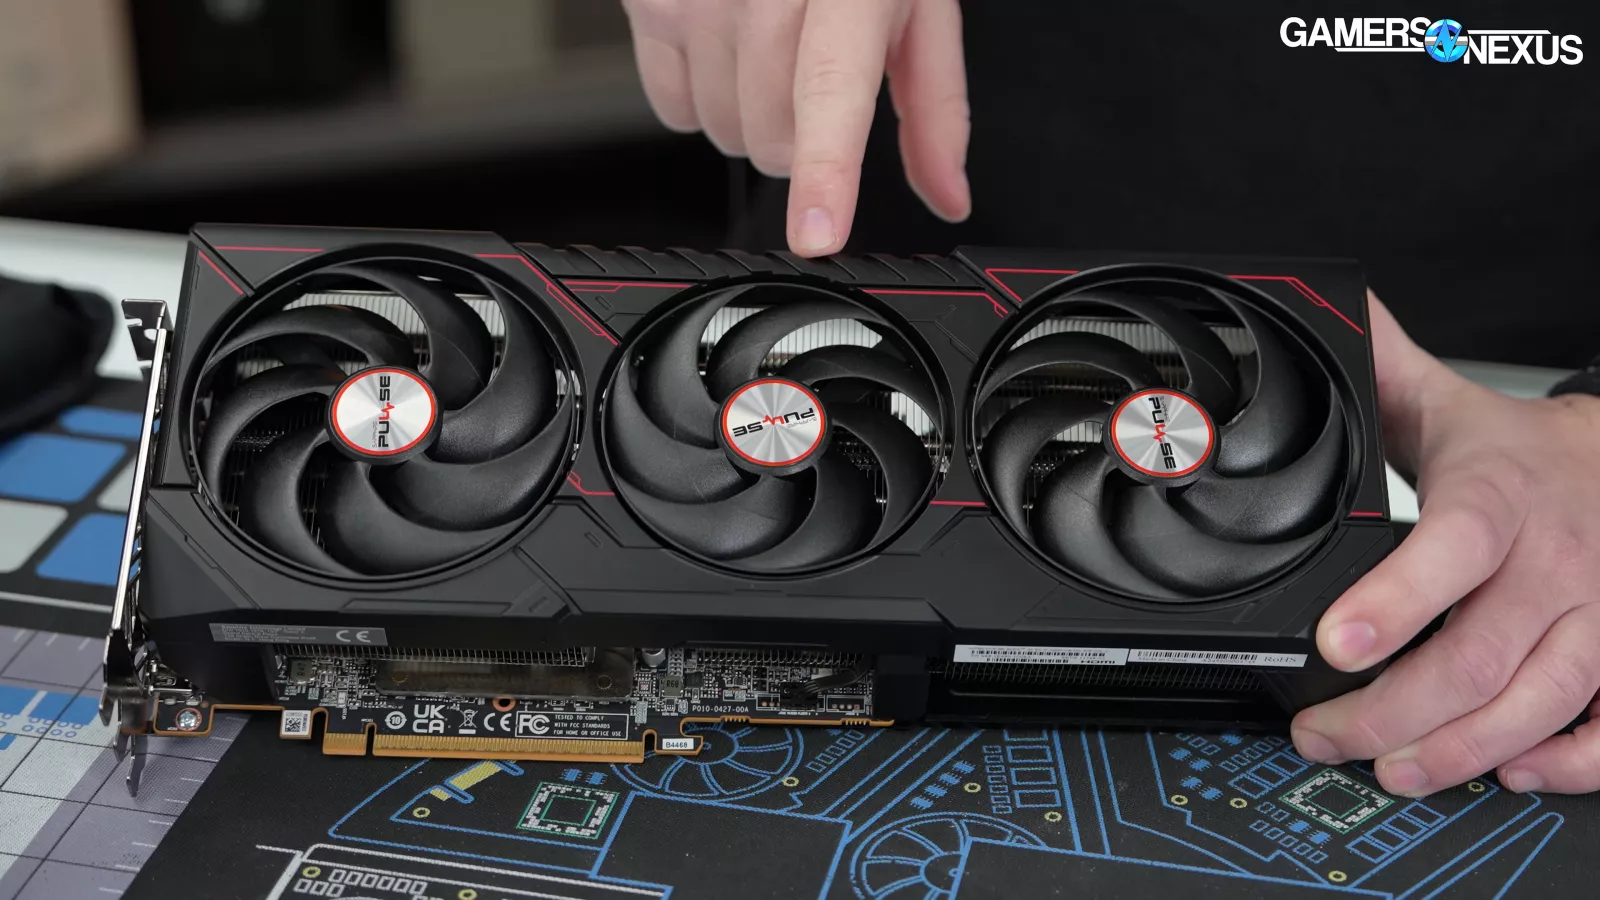
The card doesn’t have any dual VBIOS or anything fancy and it doesn’t have any physical switches, but it does run two 8-pins.
In our review of the card, we didn’t end up running our usual frequency, thermal, and acoustic tests because we were so focused on the GPU, the gaming performance, and power consumption. So we’re going to include some of that data in this story, but first, let’s get into the tear down.
Sapphire RX 9070 XT Pulse Tear Down


Prepping to open up the card, we see a bunch of Phillips 1 screws on the backplate.


On the back of the card, there are 4 screws for the retention mechanism, which holds the cooler to the GPU. We noticed that one of the screws had a tamper seal, which simply had the letter “P” on it. We’re not exactly sure what that’s supposed to indicate, maybe Pulse?
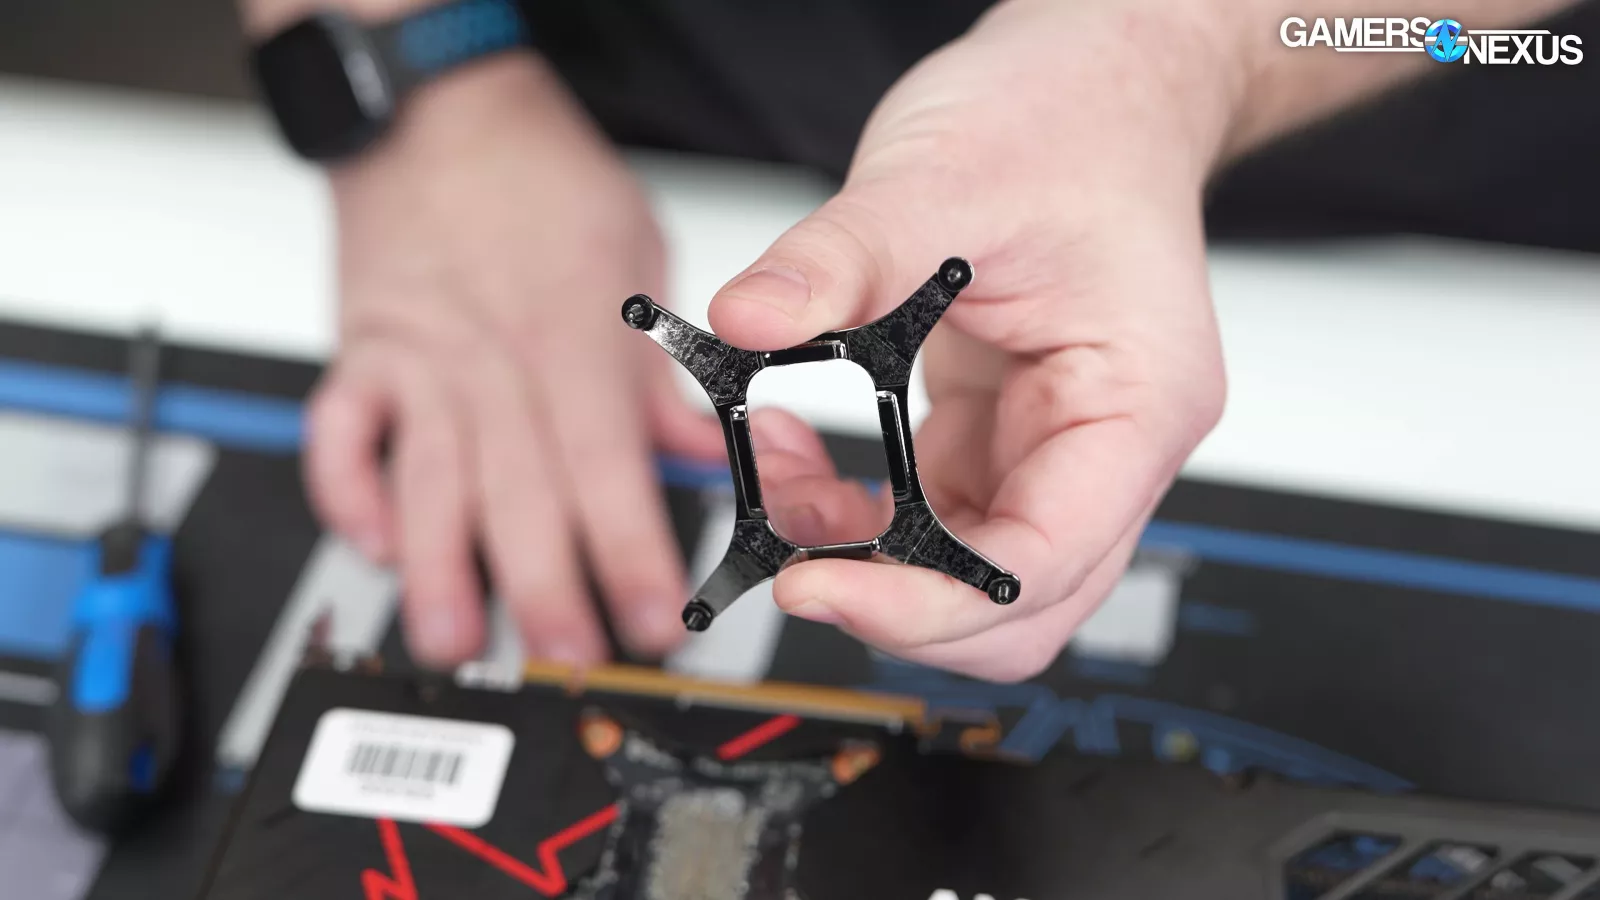
The leaf spring uses captive screws.
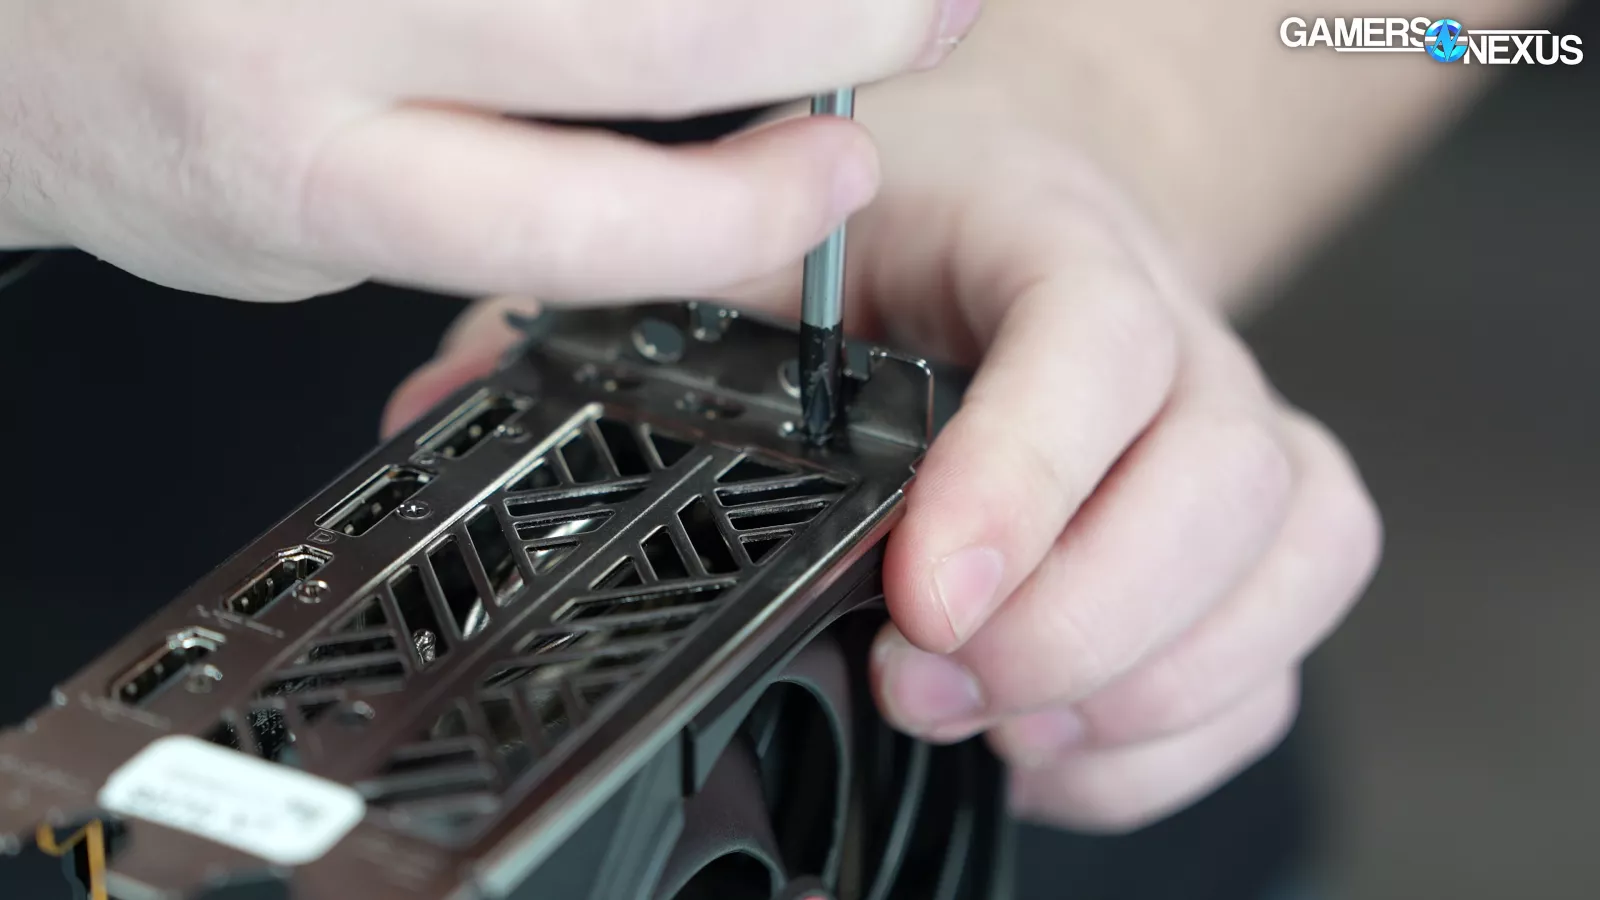
Before opening up the card, we’ve got to remove some last few screws on the rear of the card.
Opening up the card and taking the frame off, we can see that there are screws holding the fans in place, which can be removed for easy repairability.
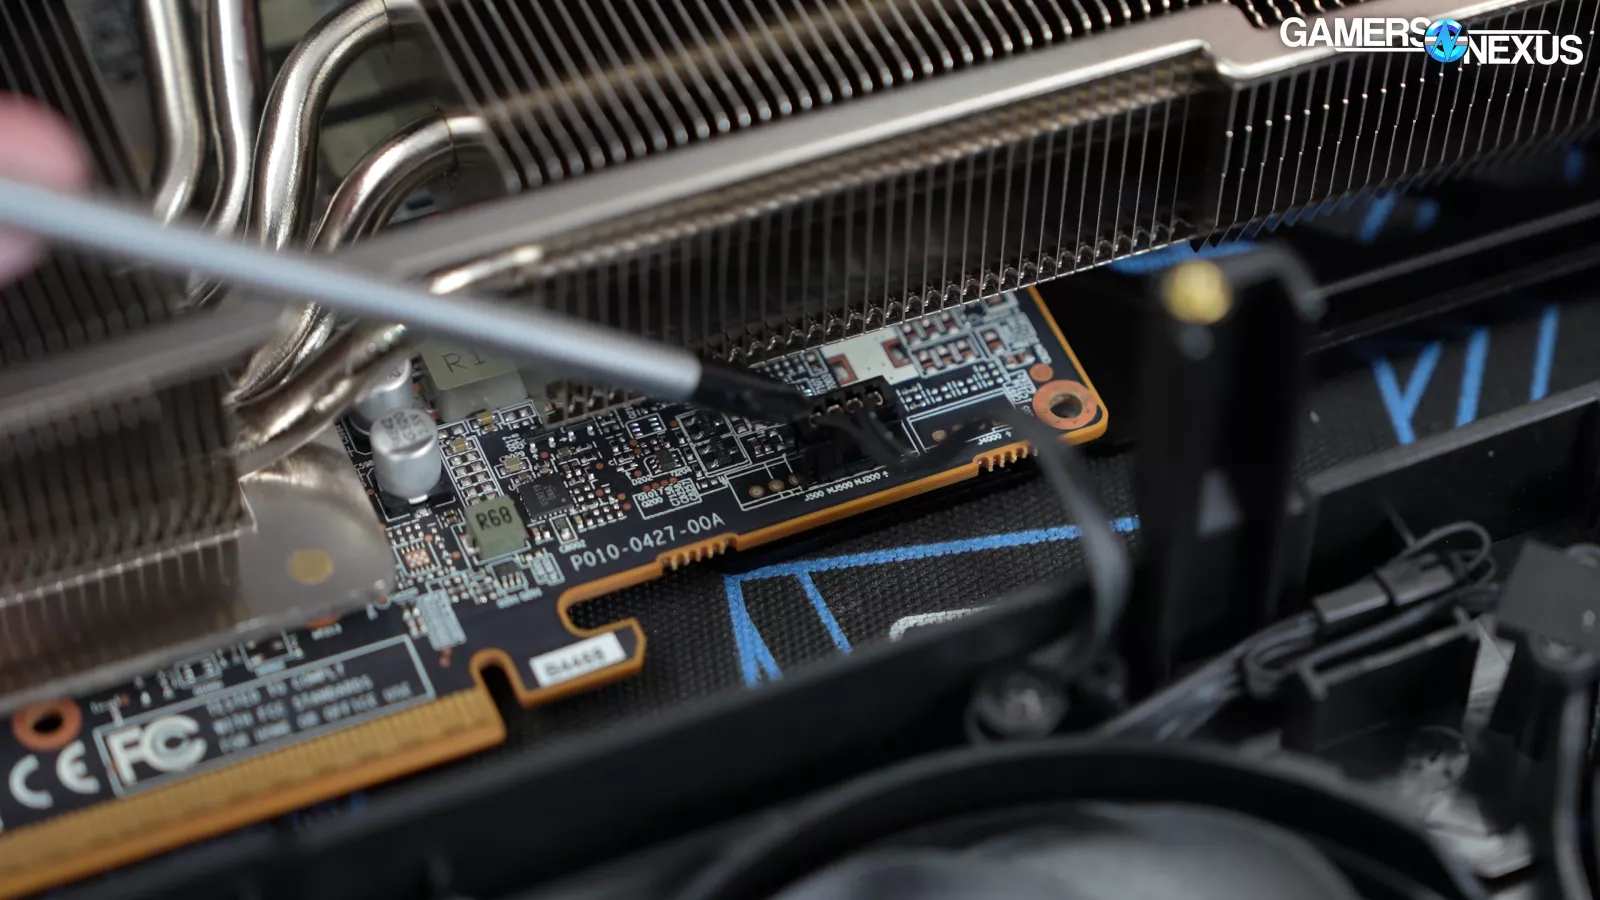
The fan cable is accessible without needing to take the rest of the heat sink off, which is awesome to see.


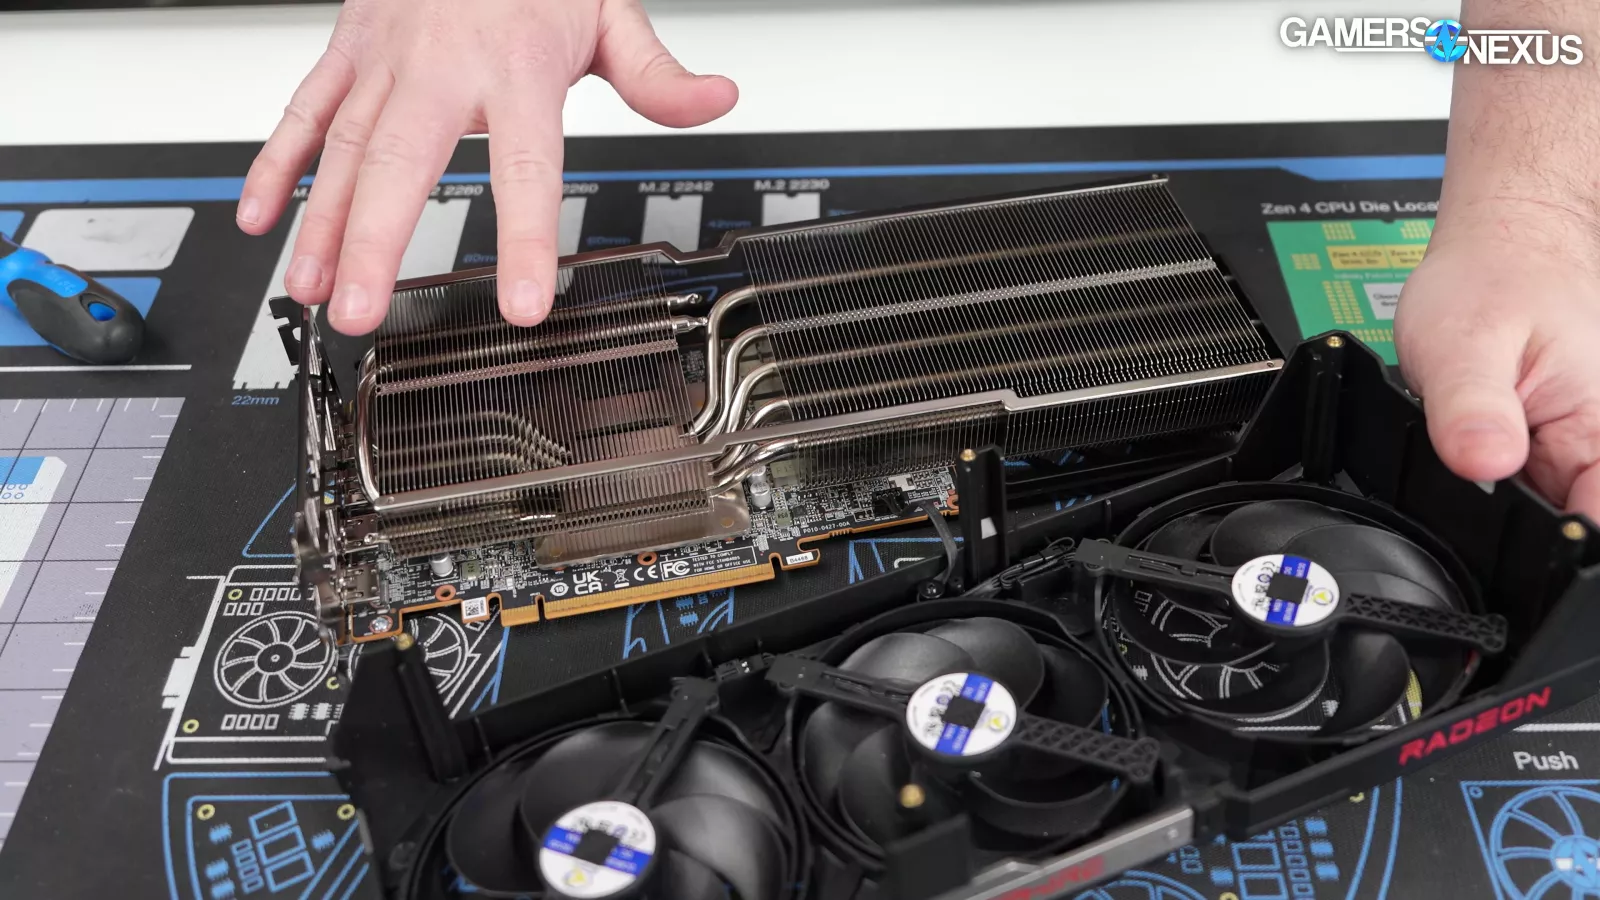
Moving forward, we can now remove the heat sink off the card, which exposes the GPU’s long die.
The underside of the heat sink has a plate for the memory contact coupled with a standard copper coldplate.
On the PCB, there are a couple more screws securing the PCB to the backplate. In total, there were 16 screws we had to remove, which isn’t bad. Getting access to just the fans, however, requires removing 10 screws.


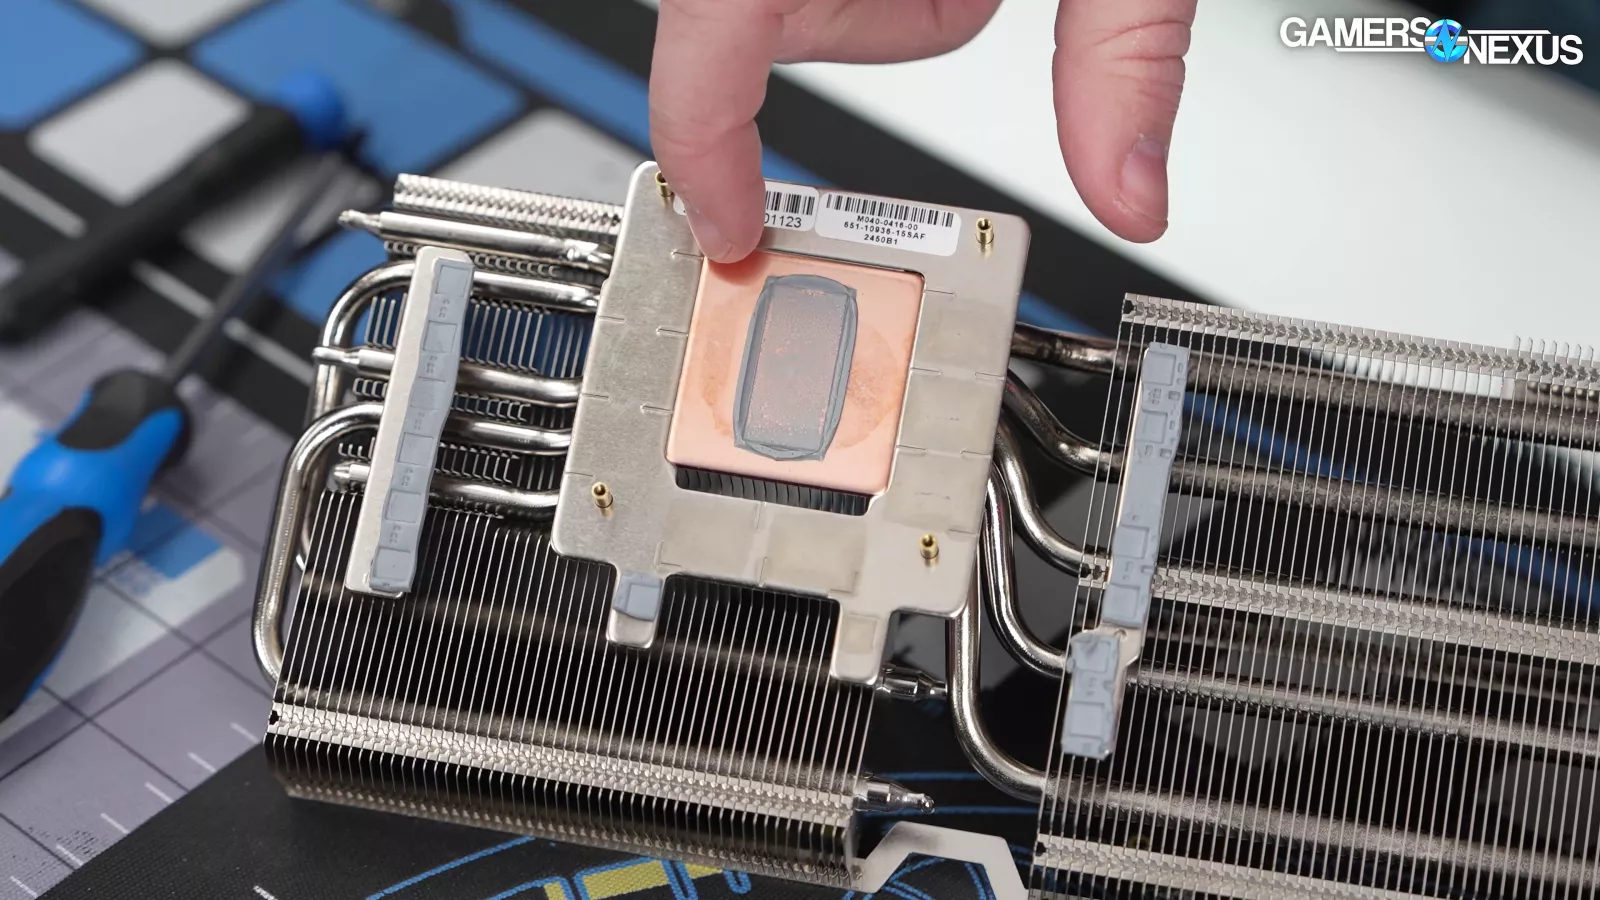
Taking a look at pressure distribution, we noticed some uneven pressure on one side of the GPU die. Looking at the copper coldplate, we can see that the contact here was not that good and the pressure was different from the top to the bottom. With the GPU, it’s really important that the whole die has contact so components don’t die. Sapphire’s implementation of thermal paste isn’t going to kill anything, but it is bad contact.


Taking a look back at the PCB and examining the thermal pads, they look pretty standard. Eyeballing it, they look around 1mm thick. One of the thermal pads has a small circular indentation on it, which is likely just a small hand-assembled mistake.
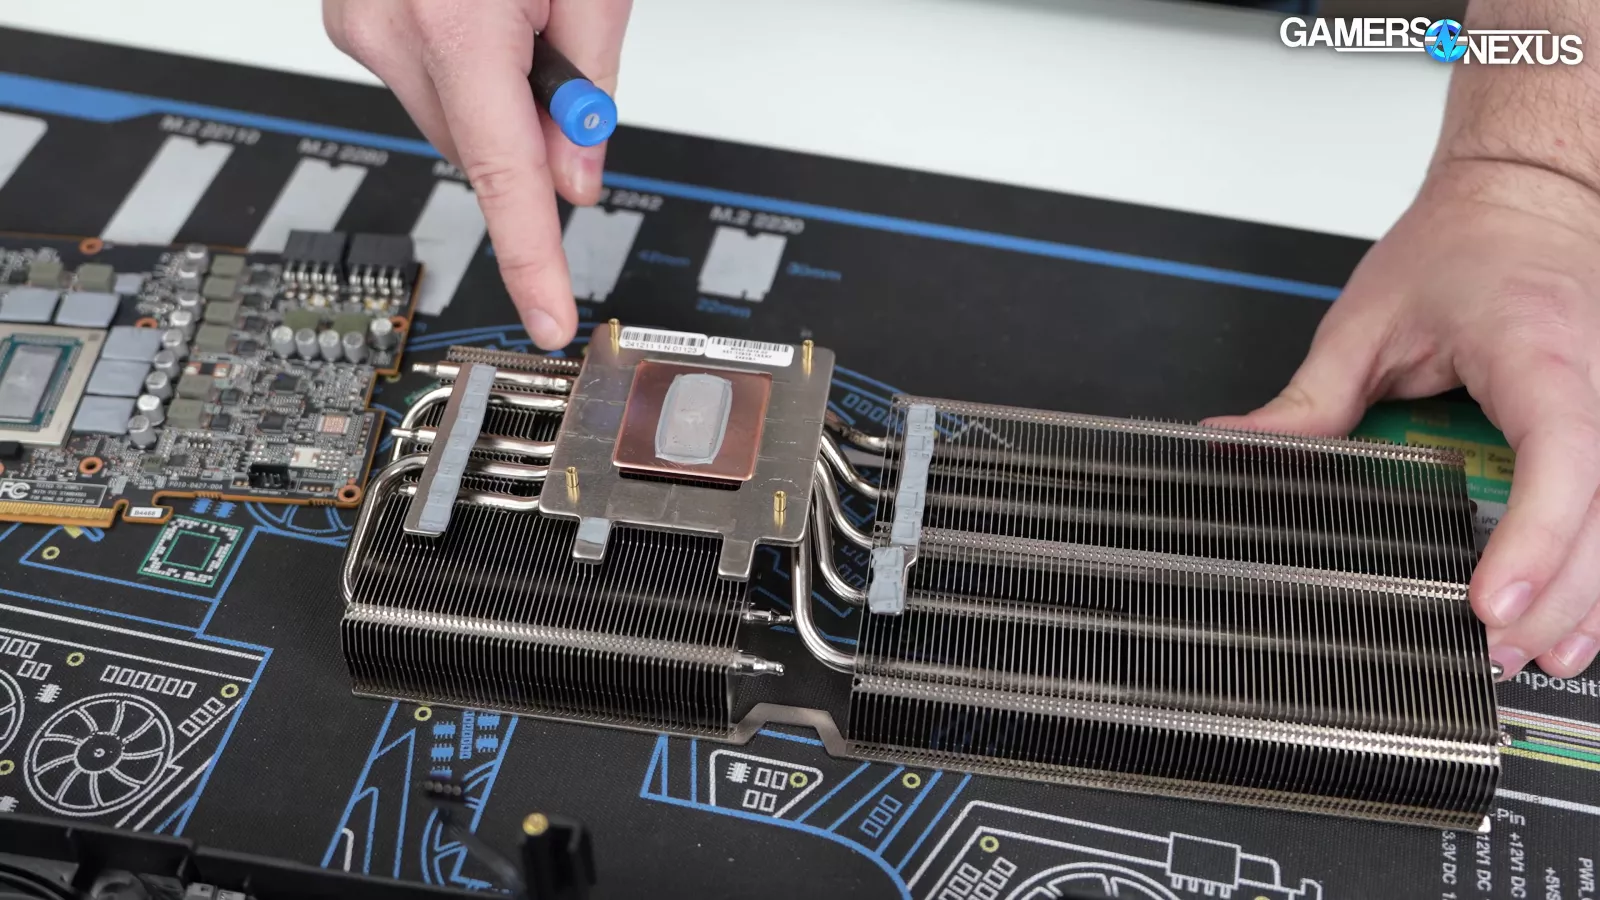
Looking back at the cold plate, we can see that it directly contacts some of the heat pipes, which goes underneath the memory. This helps with cooling.


Directly on the heat sink itself, we can see additional thermal pads, which are for the MOSFETs. Examining the heat sink, we can see that it’s very slightly bowing down. This shouldn’t affect thermal performance.


On the back of the PCB, there are no thermal pads, which means they are not making use of the metal backplate the card has. That’s always a shame to see. This might amount to a couple of degrees difference in most cases, which can be common in lower-end models.

Overall, the card has very simple construction with a standard PCB and standard execution. It’s got five 6-millimeter heat pipes, which is very typical. The card uses a tried and true design that isn’t innovative.
Thermals & Acoustics


We have a review of the Yeston RX 9070 XT Sakura Sugar Atlantis OC, aka “Waifu Edition,” coming up soon with fully detailed charts. Those include this Sapphire card and the Atlantis, so we’ll keep these shorter today.
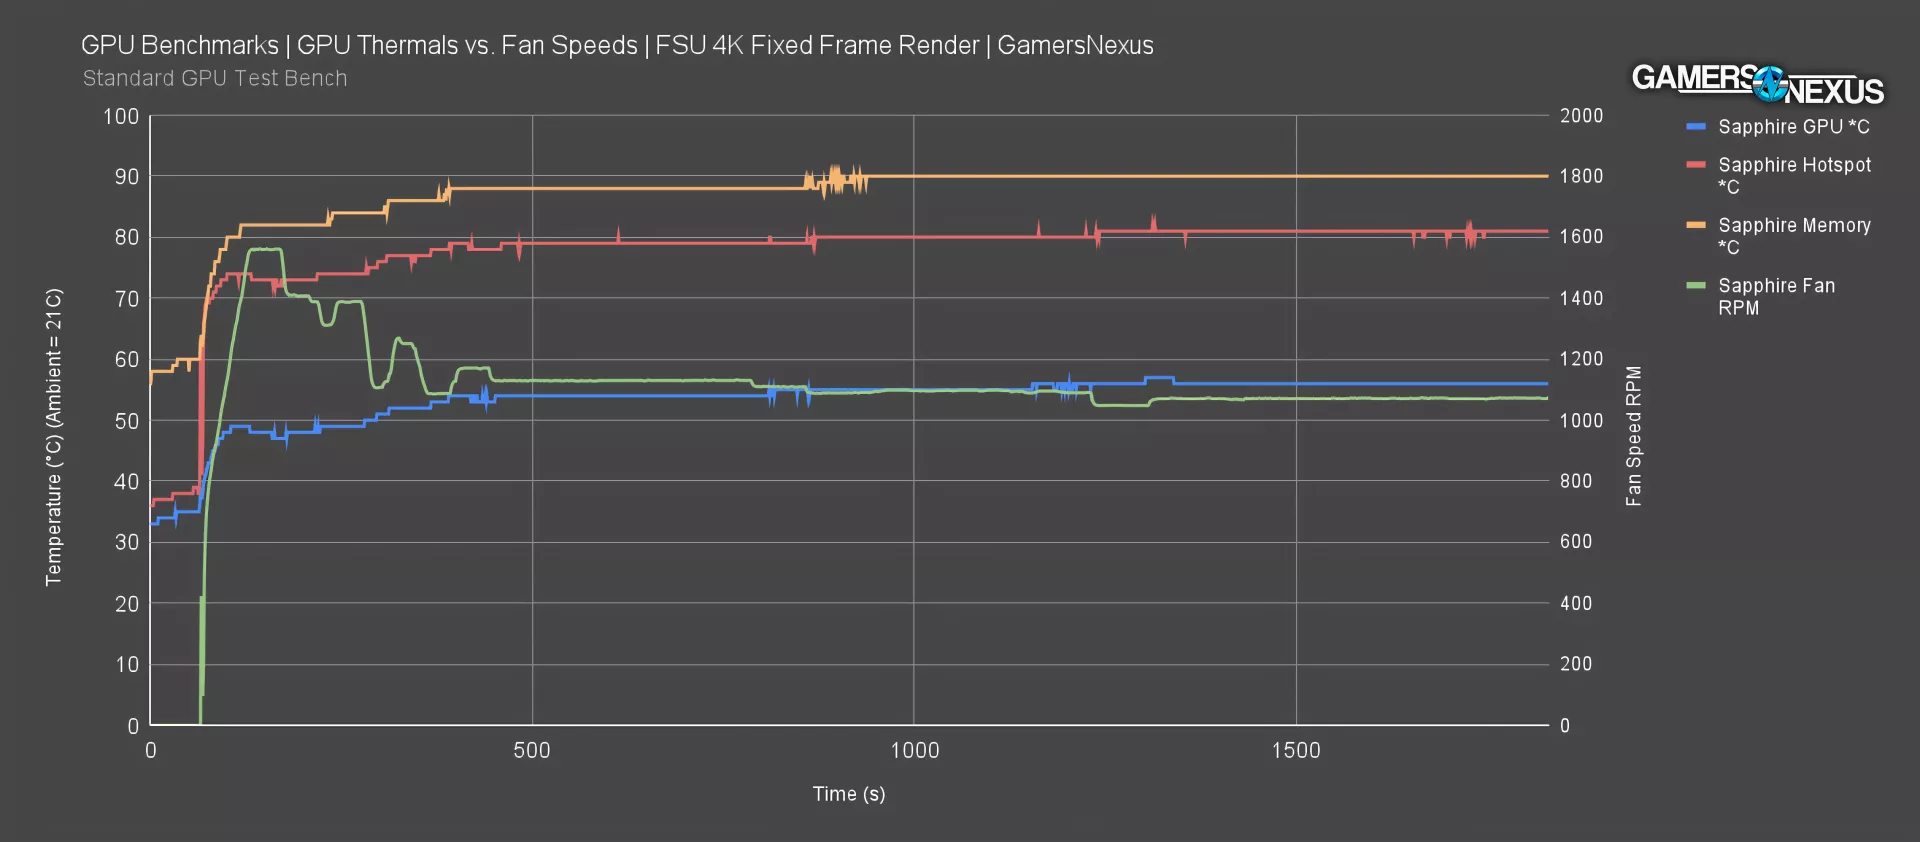
Starting first with the RPM-to-thermal response, we get this chart. The Sapphire RX 9070 XT Pulse’s GPU temperature hit about 56 degrees Celsius for average temperature in a controlled ambient of 21 C. That’s not bad. The hotspot ran at 81 degrees, which is also actually not bad in an absolute sense. Having nearly a 30-degree gap between them isn’t great, but we’re beginning to learn that this is unfortunately common for this generation so far. In Sapphire’s case, the reduced mounting pressure at the top of the die doesn’t appear to be making a measurable difference in the hotspot-to-core delta because the other two cards we’ve tested also exhibited this behavior but with more even pressure on the die. It just seems to be a behavior this generation.
Either way, it’s not in throttling territory and is still OK, but the memory temperature is a problem: It’s running at 90 degrees Celsius. The reason for this isn’t anything beyond Sapphire’s cooler design being relatively simple and its fan curve being relaxed as it is becomes a problem.
This chart shows the fan RPM as plotted against these temperature values. Sapphire and AMD really need to get this fan situation under control. There’s no reason for it to behave this erratically. VBIOS typically controls fan behavior via temperature targets so this is within Sapphire’s control, but AMD could also do more here. The Pulse’s fan blasts to 1,560 RPM and holds, drops to 1,400 and holds, then drops to 1,300 for 5 seconds, then climbs to 1,390 RPM for about 30-40 seconds, then suddenly drops precipitously to 1,100 RPM, then spikes to 1,258, then drops to 1,000 RPM, then climbs to 1,170, then drops to 1,130 and holds for a few minutes. It eventually fluctuates a few more times.
This is erratic behavior and we’ve rarely seen fans behave like this in a fixed, ongoing, unchanging workload. Unfortunately, this is extremely noticeable as an end user, because you’ll hear an irregular and annoying ramp/de-ramp rapidly cycling within a 2-3 minute period. It’d be better if it went to a higher speed and held. But Sapphire is running its fans too slow anyway, as shown by the 90-degree memory thermals. Because it’s following the relatively low 56-degree GPU temperature for the fan speed, the VBIOS isn’t able to tell the fans to spin up fast enough to deal with the memory temperature. This was actually a problem on older liquid-cooled cards a long time ago where you’d have MOSFETs and memory burnout, because the core was running cool enough, the fans weren’t ramping adequately. This resulted in hot memory and VRM, but the card didn’t “know” that because it was following the core temperature. This needs to be worked on.
Acoustics
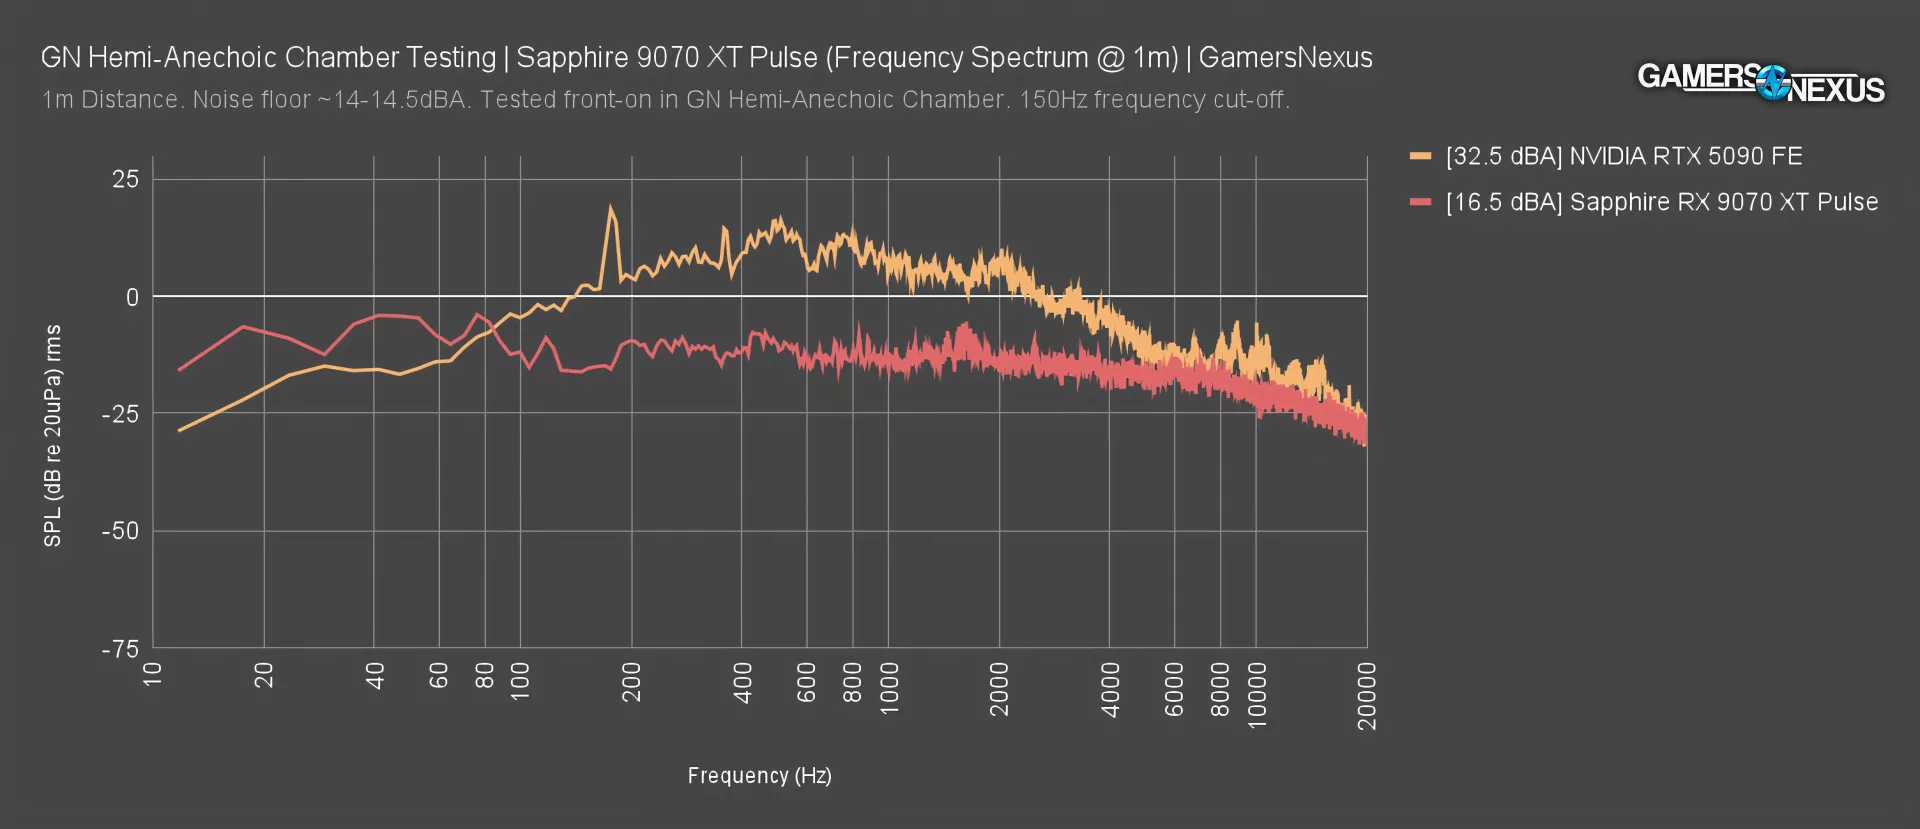
Tested in our hemi-anechoic chamber, here’s a look at the acoustics when the card was at steady state (once the fan actually settled). Because the fans were hardly spinning at the end of the test, allowing the memory to hit 90 degrees, the card was extremely quiet. It’s a little too close to our noise floor (before we upgrade our microphone, anyway), but we measured it at around 16.5 dBA at 1 meter. The 5090 FE is plotted for a comparison here. This card also hit 90 degrees on the memory, but is running a 575W heat load on the core instead of 304W. It’s also running louder.
The Pulse is quiet, but it’s too quiet. Sapphire has a ton of room to boost the noise without it becoming noticeable. And remember, you can always manually tune it back down if you’d rather incinerate your memory in a case. 90 becomes 95 inside a case pretty fast.
GPU Frequency
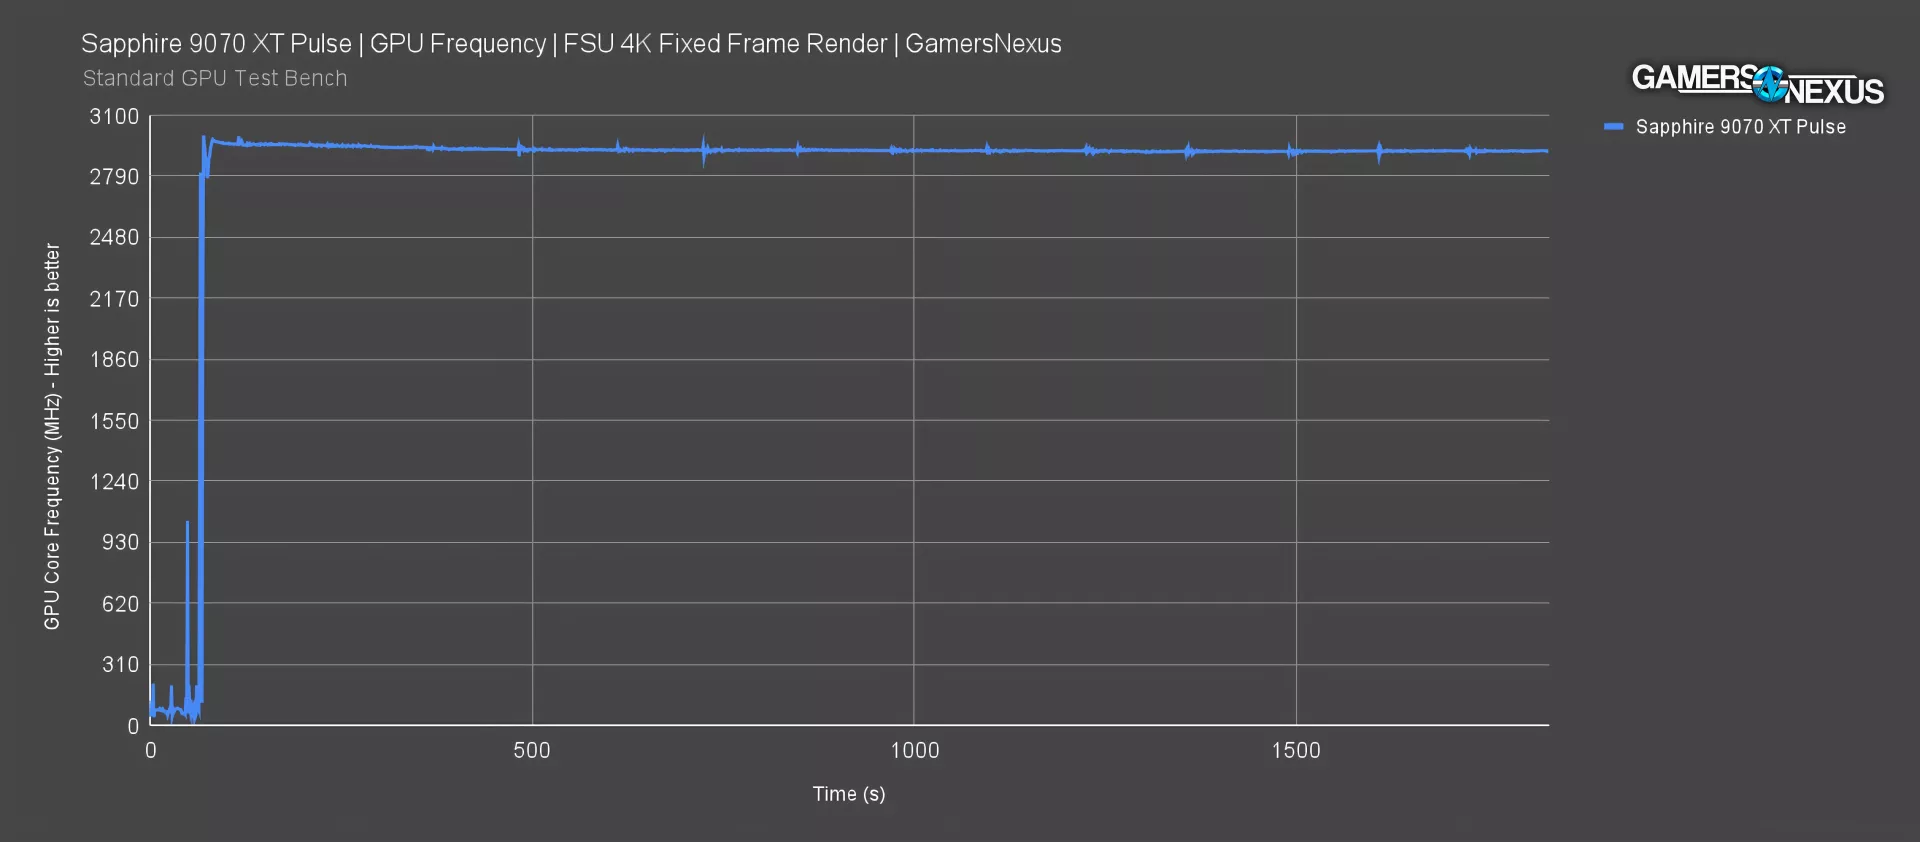
Finally, here’s the GPU core frequency plot. This shows the GPU hitting about 2,997 MHz at first launch of the workload, then settling around 2,916 MHz at steady state. AMD advertises an “up to 2,970 MHz” spec. It’s not at that speed once the workload is actually settled, but on a technicality, it did hit or exceed 2970 MHz for about 10 seconds.
Sapphire RX 9070 XT Pulse Conclusion

We’re happy with how easy Sapphire’s RX 9070 XT Pulse was to disassemble and the access to the fans is great. There were some QC issues but nothing that would prompt us to return the card and some people might not even notice those issues.
As for the quality outside of the tear-down, we already showed gaming performance in our review of the 9070 XT and commented on all of that in a video called fake MSRP. For this model specifically, Sapphire needs to work on its VBIOS tuning for the fan RPM to better deal with ramping memory thermals despite otherwise OK GPU core thermals. It has plenty of room to ramp the fans higher and most users wouldn’t notice that bump over the speed of their case and CPU fans.
We like the assembly approach and the ease with which you can get into the cooler, especially for replacing fans without disturbing the paste. This was done well by Sapphire. The assembly overall was pretty good. There were downsides, which included some QC stuff with the fin stacks being bent, but it doesn’t impact performance. The good news is that the fan speed can be adjusted either manually by users or after sales by Sapphire with a VBIOS push…hopefully.


